Showing posts with label Plant. Show all posts

Friday, January 30, 2026

Grow Guava – Easy Step-by-Step Guide for Beginners

Growing guava at home is easier than most people think. Imagine picking fresh, sweet guavas from your own garden or backyard. No chemicals, no waiting in the market, just nature’s goodness.

When I first planted my guava tree, I had no big garden—just a small corner in my backyard. Yet, today, it gives me fresh fruits almost all year. Guava growing teaches patience, care, and joy.

Do you want to grow guava from seed or sapling and enjoy fresh fruits at home? Let’s explore the step-by-step process.


Step 1: Choosing the Right Guava Variety

Not all guavas are the same. Choosing the right variety is the first step for success.

  • Tropical Guava: Sweet and soft, grows well in warm climates.

  • Common Guava: Slightly sour, easy to grow.

  • Pink Guava: High in antioxidants, needs more care.

Tip: Pick a variety that suits your climate and taste preferences.

Step 2: Growing Guava from Seeds

Growing guava from seeds is fun and cost-effective. Here’s how to do it properly:

Collecting Seeds

  1. Pick a ripe, healthy guava.

  2. Cut open the fruit and remove the seeds.

  3. Wash the seeds thoroughly to remove pulp.

Preparing Seeds

  • Dry the seeds for 2–3 days in shade.

  • Soak seeds in water for 12–24 hours before planting.

Pro Tip: Soaking improves germination by up to 40%.

Planting Seeds

  1. Fill small pots or a seed tray with a mix of garden soil, compost, and sand.

  2. Plant seeds 1 cm deep.

  3. Water gently and keep in partial shade.

  4. Seeds usually sprout within 2–4 weeks.

Step 3: Choosing the Right Soil and Location

Guava plants need fertile, well-drained soil.

  • Soil Mix: 40% garden soil, 30% compost, 20% sand, 10% coco peat.

  • Drainage: Ensure water flows freely to avoid root rot.

  • Sunlight: Guava needs 5–7 hours of sunlight daily.

Note: Guava grows best in slightly acidic to neutral soil (pH 5–7).

Step 4: Planting Guava Saplings in Garden

If you are using saplings instead of seeds:

  1. Dig a hole twice the size of the sapling’s root ball.

  2. Mix soil with compost.

  3. Place the sapling and cover with soil.

  4. Water immediately.

  5. Mulch around the base to retain moisture.

Spacing: 3–5 meters between trees for better growth.

Step 5: Watering and Care

Young guava plants need extra care:

  • Watering: Daily in summer, 3–4 times a week in winter.

  • Fertilizer: Use compost or organic manure every 20–30 days.

  • Pruning: Trim tops and weak branches to encourage growth.

Tip: Guava plants respond well to organic care. Avoid chemical fertilizers for better taste.

Step 6: Pest and Disease Management

Common problems include:

ProblemCauseSolution
Yellow leavesOverwateringReduce water
Leaf curlHeat stressProvide shade
Spots on leavesFungusImprove airflow
InsectsWeak plantNeem oil spray

Regular monitoring keeps your tree healthy and fruit-bearing.

Step 7: Harvesting Guava

  • Seed-grown trees take 3–4 years to bear fruits.

  • Sapling-grown trees can fruit in 1–2 years.

  • Guavas are ready when they turn slightly soft and fragrant.

Pro Tip: Pick fruits carefully to avoid bruising.


Frequently Asked Questions (FAQs)

Can I grow guava indoors?

Yes, during early growth. Keep near sunlight. Move outdoors after 2–3 months.

Do seed-grown guavas taste good?

Yes, but sweetness depends on care and soil quality.

How long do guava seeds remain viable?

Fresh seeds work best within 2–3 weeks. Old seeds may not germinate.

Is grafting better than seed growing?

Grafting gives faster fruit, seed-growing gives stronger trees. Choose according to your goal.

Can guava grow in small spaces?

Yes, with proper pruning and spacing, even small gardens can grow guava trees.

Conclusion: Start Growing Guava Today

Growing guava is not just about fruits. It’s about patience, joy, and connecting with nature. A tiny seed or small sapling can grow into a strong tree giving fresh fruits for years.

Start today. Care for it daily. Enjoy the satisfaction of home-grown guava.

Are you ready to plant your first guava tree and enjoy natural fruits at home?

Saturday, June 14, 2025

Peace Lilies Indoors: A Simple Guide to Happy Plants

Do you want to bring peace and beauty into your home? Peace lilies are wonderful plants for indoor use. They have pretty white "flowers" and green leaves. These plants do more than look nice; they also clean the air in your home. This makes them an excellent choice for any room. I love having my peace lily near my reading chair. It makes the space feel calm and fresh. This plant can also make your home feel peaceful.


How Much Light Does Your Peace Lily Need?

Do you ever wonder if your plants get enough light? Peace lilies come from thick, warm forests where sunlight does not shine directly on them. They grow under big trees. This tells us a lot about what kind of light they like in our homes. Your peace lily needs bright light, but not direct sun. Think of a window that faces east or north. These windows give gentle morning light or light that is not too strong. If your window faces south or west, use a thin curtain. This curtain acts like the big trees in the forest, softening the light. Direct sun, especially in the afternoon, is too intense for peace lilies. It can burn their leaves, causing them to appear brown. This happened to my first peace lily. 

I learned quickly that soft light is best. Even if your room is a bit dark, your peace lily can still grow there. But it might not make many white "flowers." If you want more blooms, move it to a spot with a little more light. A good rule is to find a spot where the light is bright enough for you to read comfortably without a lamp, but without direct sunlight hitting the plant. This careful balance makes a happy plant.

How Do You Water Your Peace Lily?

Are you unsure when to water your plants? Watering peace lilies can be tricky, but your plant will let you know when it needs water. Peace lilies are very good at showing when they are thirsty. Their leaves will start to droop. Do not worry when this happens! It is just your plant telling you, "I need a drink!" I remember one morning my peace lily looked very sad and droopy. I gave it some water, and within a few hours, it stood up tall again. It was amazing to see! The best way to know when to water is to touch the soil. Put your finger about two inches deep into the pot. If the soil feels dry, it is time to water. When watering, give it a generous amount of water. 

Continue pouring water until it emerges from the holes at the bottom of the pot. This ensures that all the roots receive water. Do not let your peace lily sit in water. If the pot sits in water for too long, the roots can rot, and your plant will die. Ensure your pot has holes at the bottom to allow water to drain out. It is better to give your plant a little less water than too much. Peace lilies can tolerate being slightly dry better than being overly wet. Some people even use filtered water for their peace lilies, or they let tap water sit for a day. This allows bad chemicals like chlorine leave the water. This small step can make a big difference for your plant's health.

Why Is Humidity Important For Peace Lilies?

Does your home feel dry sometimes? Peace lilies love air that is a bit wet, like the air in a warm, rainy forest. This is because they come from places with high humidity. Your home's air might not be as wet as a rainforest, but you can help your peace lily feel at home. One easy way is to spray the leaves with a light mist of water a few times a week. Imagine a gentle morning dew; that is what your plant likes. Another idea is to use a pebble tray. 

Put some small stones in a shallow dish. Add water to the dish, but make sure the bottom of your plant's pot does not touch the water. As the water from the dish dries, it makes the air around your plant more humid. This creates a small, wet cloud just for your peace lily. I often put my peace lily near other plants. When plants are close together, they release a little bit of moisture into the air. This makes the area around them more humid. So, grouping your plants can help all of them feel better. These simple steps make a big difference in keeping your peace lily healthy and happy, just like it would be in its natural home.

What Kind Of Soil And Pot Does Your Peace Lily Need?

Have you considered the soil in which your plant lives? The right soil and pot are like a good home for your peace lily. Your plant needs soil that lets water drain away easily. This is super important to stop the roots from rotting. Look for potting soil specifically designed for indoor plants, or one that contains extra perlite or bark. Perlite appears as small white balls, which help the soil remain light and airy. Bark, like what you find in orchid pots, also helps with drainage. 

I always check the bag to ensure the soil is labelled as "well-draining." Do not put your peace lily in a pot that is too big. They like to be a little bit crowded in their pot. This means their roots fill the pot nicely. If the pot is too large, the soil can remain wet for too long, which is detrimental to the roots. Only move your peace lily to a bigger pot when you see its roots coming out of the holes at the bottom, or if the plant seems to fall over easily because it is too big for its current pot. When you do repot, choose a pot that is just one size bigger than the old one. This keeps your plant happy and healthy for a long time.

How Do You Feed Your Peace Lily?

Do your plants need extra food? Peace lilies do not need a lot of food. They are not like some other plants that eat a lot. They get most of what they need from their soil and water. When your peace lily is growing new leaves and making "flowers," usually in spring and summer, you can give it a little extra food. Use a liquid plant food made for indoor plants. 

Be sure to mix it with water, using only half the amount indicated on the bottle. This is important because excessive food can harm your plant. I usually feed my peace lily once every two to four weeks during these warmer months. As the weather gets colder, in the fall and winter, your peace lily slows its growth. It is like taking a nap! During this time, you should feed it less often, or even stop feeding it completely. This helps your plant rest and saves its energy. Providing your peace lily with the right amount of food helps it stay strong and healthy without becoming overwhelmed.

How Do You Keep Your Peace Lily Tidy?

Do you trim your plants to keep them looking nice? Keeping your peace lily neat helps it grow better and look more beautiful. When a white "flower" starts to fade, it might turn green or brown. This means it is done. You should cut this stalk off. Cut it as close to the base of the plant as possible. This helps your plant use its energy to make new "flowers" instead of wasting it on old ones. Think of it like giving your plant a haircut!

Additionally, leaves may sometimes turn yellow or brown. This is normal as older leaves die. Cut these off too. Removing them makes your plant look tidy and encourages it to grow new, healthy leaves. I always check my plant every week to see if any leaves need trimming. Another helpful thing is to gently wipe the leaves with a soft, damp cloth. Dust can build up on the leaves, and this makes it harder for the plant to "breathe" and make its own food from light. Keeping the leaves clean helps your peace lily stay healthy and green.

Why Is Your Peace Lily Having Problems?

Are you seeing problems with your peace lily? Even with the best care, sometimes peace lilies show signs that something is wrong. But do not worry, most issues have simple fixes. If your peace lily's leaves turn yellow, it often means you are watering it too much or not enough. First, check the soil. Is it too wet, or too dry? Adjust your watering schedule based on your findings. Yellow leaves can also indicate that the plant is receiving too much direct sunlight. 

If the tips of the leaves are turning brown, it usually means the air is too dry, or you are not watering it consistently. Try misting your plant more often or using a pebble tray. If your plant is not making any white "flowers," it likely needs more light. Move it to a brighter spot, but remember, no direct sun! The most common problem, and the easiest to fix, is when your peace lily's leaves droop down. This almost always means your plant is very thirsty. Give it water right away, and you will see it perk up quickly, often within a few hours. I have seen my own peace lily droop dramatically and then bounce back perfectly after a good drink.

Remember, consistency in care is key to a happy peace lily.

For best results, mimic its natural rainforest home with indirect light and some humidity.

Frequently Asked Questions About Peace Lilies Indoors

Q: How often should I water my peace lily? A: Water your peace lily when the top one to two inches of soil feel dry. You will also notice the leaves start to droop slightly when it needs water.

Q: Why are the leaves of my peace lily turning yellow? A: Yellow leaves usually mean you are giving your peace lily too much water or not enough water. Check the soil moisture. It can also happen if the plant gets too much direct sunlight.

Q: Does my peace lily need direct sunlight? A: No, peace lilies prefer bright, indirect sunlight. Direct sun can burn their leaves. Place them near a window with filtered light.

Q: My peace lily is not blooming. What can I do? A: If your peace lily is not blooming, it likely needs more light. Move it to a brighter spot, but make sure it still receives indirect light.

Q: Are peace lilies safe for pets? A: Peace lilies are toxic if eaten by pets or humans. They contain calcium oxalate crystals that can cause irritation. Keep them out of reach of children and pets.

Conclusion

So, are you ready to add a peace lily to your home? Peace lilies are truly special plants. They are easy to care for, make your home look lovely, and even clean the air. I hope this simple guide helps you grow a healthy and happy peace lily. Bringing a peace lily into your home is like inviting a little piece of nature's calm inside. It can make any room feel more peaceful and beautiful. Give it a try, and see the difference it makes!

You May Also Read:

How to Care for Peace Lilies Indoors


Tuesday, July 9, 2024

How to Use Grow Lights for Succulents: Boost Growth Indoors

Place the grow lights 6-12 inches above the succulents. Ensure they receive 12-14 hours of light daily.

Using grow lights for succulents can ensure they thrive indoors. Natural sunlight may not always be sufficient, especially during winter or in shaded areas. Grow lights provide the necessary light spectrum that succulents need for photosynthesis. LED grow lights are energy-efficient and emit the right wavelengths.

Positioning the lights correctly and maintaining a consistent schedule can promote healthy growth. It's crucial to monitor the distance to avoid burning the plants. Proper use of grow lights can replicate natural sunlight, helping succulents maintain their vibrant colors and robust structure. This method is essential for indoor gardeners seeking to keep their succulents healthy year-round.

Grow Lights

Grow lights are artificial light sources. They help plants grow indoors. These lights mimic natural sunlight. They provide the right light spectrum for plant growth. Many types of grow lights exist. Each type serves different plant needs.

Succulents need lots of light. They thrive in bright conditions. Winter days are short. Indoor light is often not enough. Grow lights solve this problem. They provide extra light. This helps succulents stay healthy. They prevent plants from stretching and becoming weak.

How to Use Grow Lights for Succulents: Boost Growth Indoors


Types Of Grow Lights

Different types of grow lights, such as LED, fluorescent, and incandescent, cater to the specific needs of succulents. Each type offers unique benefits, ensuring optimal growth and vibrant colors for your plants.

Led Grow Lights

LED grow lights are energy-efficient. They last a long time and produce less heat. This makes them safe for succulents. They are also customizable. You can choose the color spectrum needed. Many gardeners prefer LED grow lights for their versatility.

Fluorescent Grow Lights

Fluorescent grow lights are also efficient. They are cheaper than LED lights. They emit a cool light. This helps prevent succulent leaves from burning. T5 and T8 bulbs are popular choices. These lights are good for small indoor gardens.

Incandescent Grow Lights

Incandescent grow lights are not ideal for succulents. They produce a lot of heat. This can harm the plants. They are also less efficient. These lights use more electricity. Most gardeners avoid incandescent lights for growing succulents.

Choosing The Right Grow Light

Succulents need a full spectrum of light. Blue light helps in growing leaves. Red light aids in blooming. A mix of both is ideal.

Succulents thrive under moderate to high light intensity. A light with 15-40 watts is usually enough. Make sure not to burn the plants.

Choose a light that covers all your plants. Measure the area before buying. Larger setups may need multiple lights.

Setting Up Grow Lights

Place grow lights above the succulents. Ensure they cover all plants evenly. Avoid shadows by adjusting the angle.

Keep lights 6 to 12 inches away. Close distance ensures plants get enough light. Too close can burn leaves.

Use adjustable stands for flexibility. Hang lights from the ceiling for more space. Clip-on lamps work for small setups.

Light Schedules And Timing

Succulents need 12 to 14 hours of light daily. This ensures they grow strong and healthy. Use a timer to automate the light schedule. This will help maintain consistency.

Succulents require a balance of light and darkness. Ensure they get 10 to 12 hours of darkness each night. This mimics their natural environment. Proper cycles prevent stress and promote growth.

Adjust light duration as seasons change. In winter, succulents may need more light. In summer, they might need less. Monitor their growth and adapt accordingly.

How to Use Grow Lights for Succulents: Boost Growth Indoors


Monitoring Plant Health

Healthy succulents have vibrant colors and firm leaves. New leaves grow regularly. Plants look full and strong. No signs of wilting or discoloration.

Light stress causes yellowing leaves. Brown spots may appear. Leaves become soft and droopy. Plants may stretch and look leggy. Too much light can burn the leaves.

Move lights closer for more light. Move lights away for less light. Use a timer for consistent light periods. Rotate plants for even light distribution. Observe and adjust as needed.

Supplemental Care Tips

Grow lights can effectively support succulent growth indoors. Position lights 6-12 inches above plants for optimal results. Ensure a daily exposure of 12-16 hours for healthy, vibrant succulents.

Watering Needs

Succulents need water less often than other plants. Overwatering can harm them. Check the soil before watering. It should be dry. Water deeply but less frequently. Use a pot with drainage holes.

Fertilizing Succulents

Succulents need fertilizer during their growing season. Use a balanced, water-soluble fertilizer. Dilute the fertilizer to half strength. Fertilize once a month in spring and summer. Avoid fertilizing in winter.

Pest Control

Check succulents for pests regularly. Common pests include aphids and mealybugs. Use insecticidal soap to treat pests. Remove pests manually if possible. Keep the growing area clean to avoid infestations.

How to Use Grow Lights for Succulents: Boost Growth Indoors


Common Mistakes To Avoid

Succulents can get too much light. This can cause sunburn. Leaves may turn brown or white. It is important to give them a break from light.

Lights should not be too close to the plants. This can cause heat damage. Keep lights at a safe distance. Check the plant's response regularly.

Light is not the only thing succulents need. They also need water and nutrients. Soil quality is very important. Ensure proper drainage to avoid root rot.

Frequently Asked Questions

Can I Use A Grow Light For Succulents?

Yes, you can use a grow light for succulents. Choose full-spectrum LED lights for best results. Ensure 12-14 hours of light daily.

How Do You Stress Succulents With Grow Lights?

To stress succulents with grow lights, gradually increase light intensity and duration. Maintain proper distance to avoid burning.

How High Should Grow Lights Be Above Succulents?

Place grow lights 6 to 12 inches above succulents. Adjust height based on plant response and light intensity.

How Much Light For Indoor Succulents?

Indoor succulents need bright, indirect sunlight for 4-6 hours daily. Place them near south or east-facing windows. Rotate regularly.

Conclusion

Mastering grow lights can transform your succulent care routine. With the right setup, your plants will thrive indoors. Remember to adjust light intensity and duration for optimal growth. Experiment with different types of grow lights to find what works best.

Happy gardening!

Read More Article: What Color Grow Light for Cactus

Tuesday, July 2, 2024

How Do Hydroponic Towers Work | Grow Green, Grow Smart!

Hydroponic towers circulate nutrient-rich water to plants grown in vertical columns. This system maximizes space and promotes efficient plant growth.

Hydroponic towers are an innovative solution for urban gardening and sustainable farming. These systems utilize vertical columns, allowing plants to grow in a soil-free environment. Nutrient-rich water circulates through the towers, delivering essential minerals directly to the plant roots. This method conserves space and uses less water compared to traditional farming.


Hydroponic towers are ideal for growing various crops, from leafy greens to herbs. They offer a practical and efficient way to produce fresh produce year-round, making them increasingly popular among home gardeners and commercial growers.


How Do Hydroponic Towers Work: Grow Green, Grow Smart!

What Is Hydroponics?

Hydroponics is a way to grow plants without soil. Instead, plants grow in a nutrient-rich water solution. This method allows plants to grow faster and healthier. Hydroponics uses less water than traditional farming. It is perfect for places with limited space and resources.

Benefits Of Hydroponic Towers

  • Space-saving: Grow many plants in a small area.

  • Water-efficient: Use less water compared to soil gardening.

  • Faster growth: Plants grow quicker and healthier.

  • Less pests: Fewer chances of pests and diseases.


How To Set Up A Hydroponic Tower

Choose a location: Find a spot with enough light.

Assemble the tower: Follow the instructions to build your tower.

Add water and nutrients: Fill the tank with water and add nutrients.

Plant your seeds: Place seeds in small pots or baskets.

Start the pump: Turn on the pump to circulate water and nutrients.


Maintaining Your Hydroponic Tower

Check water levels daily. Ensure the pump is working. Add nutrients to the water as needed. Trim plants to keep them healthy. Watch for signs of pests or diseases. Clean the system regularly to prevent clogs.

The Basics Of Hydroponic Towers


Hydroponic towers are a modern way to grow plants without soil. They use water and nutrients to help plants grow faster. They save space and can be used indoors or outdoors. Let's explore the basics of hydroponic towers.


What Are Hydroponic Towers?


Hydroponic towers are vertical structures designed for growing plants. They use water instead of soil and are enriched with nutrients, which helps plants grow. These towers are perfect for small spaces, such as apartments or small gardens.


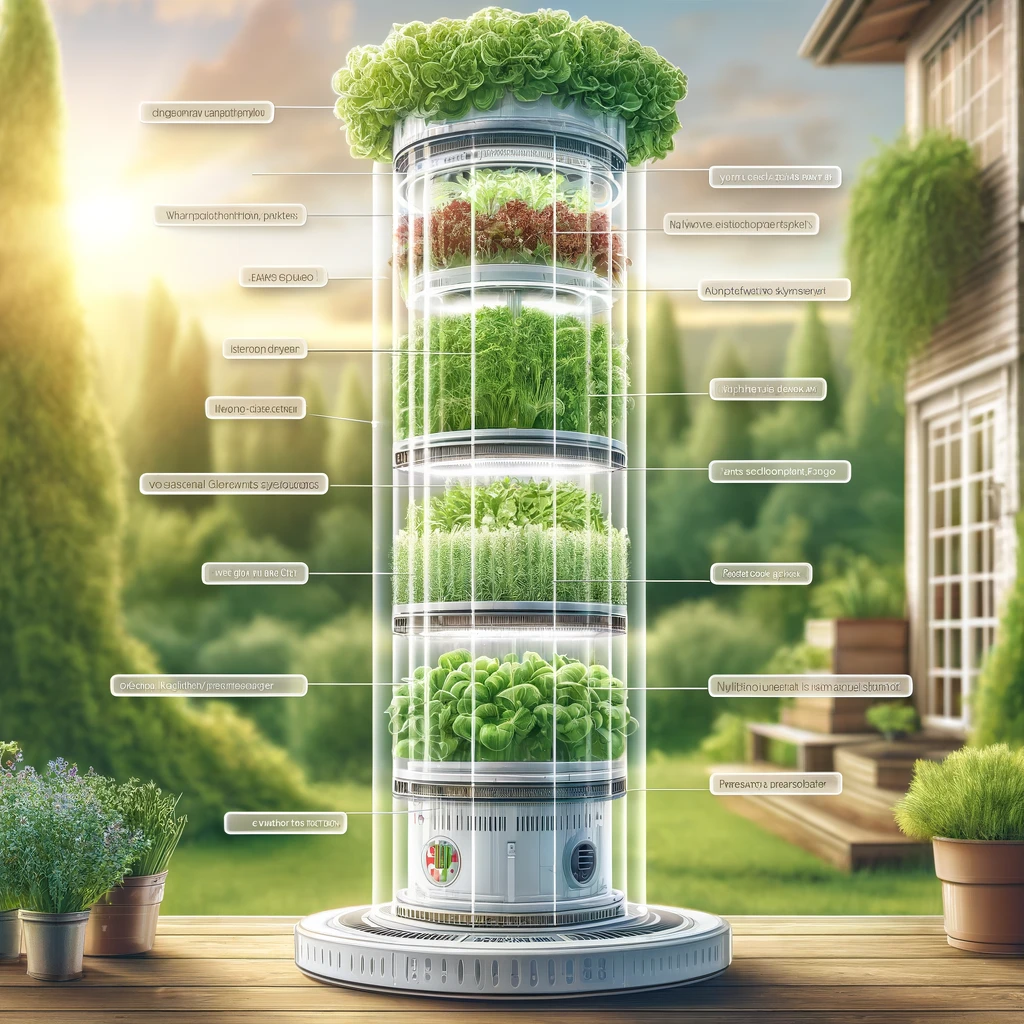
Components of a hydroponic tower include:


  • Water reservoir: Holds nutrient-rich water.
  • Pump: Circulates the water to the plants.
  • Grow cups: Where the plants are placed.
  • Lighting: Provides light for indoor towers.


How they work:


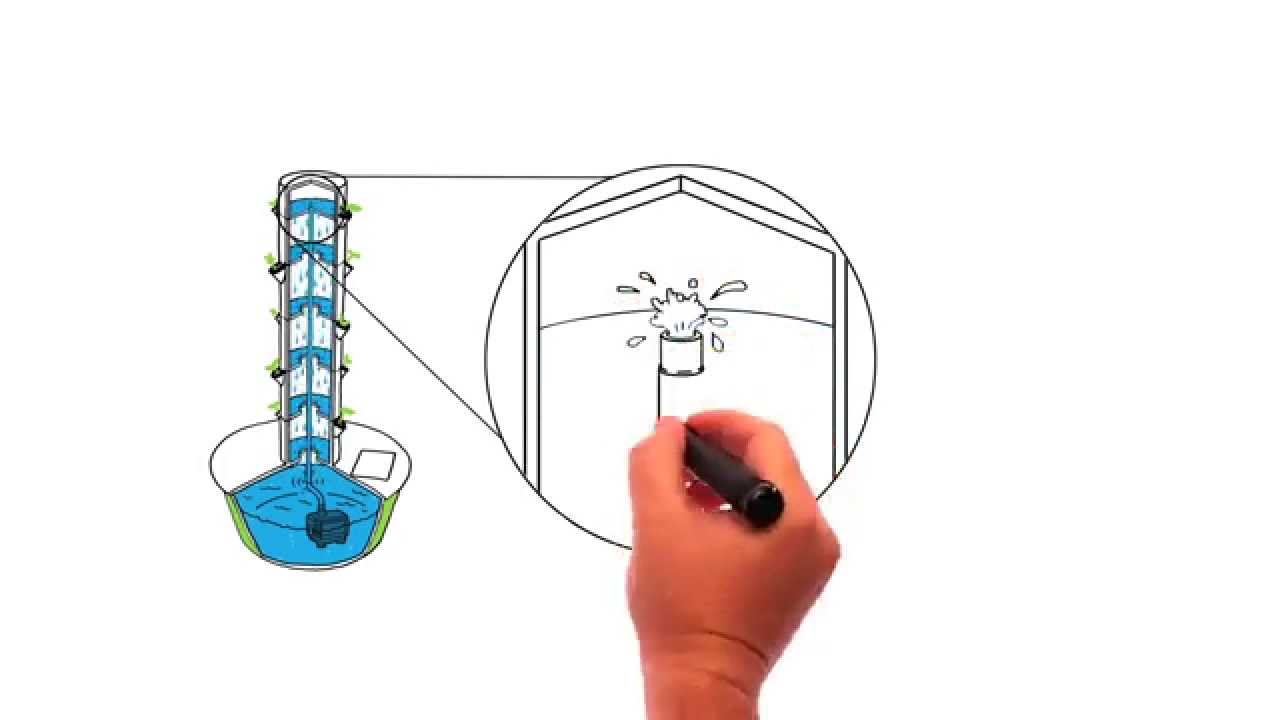
  • Water is pumped from the reservoir to the top of the tower.
  • Water trickles down, feeding the plants.
  • Excess water returns to the reservoir.


This cycle keeps the plants hydrated and nourished. Hydroponic towers are easy to maintain. They use less water than traditional gardening.


The Benefits Of Hydroponic Towers


Hydroponic towers offer many advantages. They are space-efficient and can be used in small areas, making them ideal for urban settings.


Benefits include:


  • Faster growth: Plants grow quicker with nutrient-rich water.
  • Less water usage: Up to 90% less water than soil gardening.
  • No soil needed: Reduces the risk of soil-borne diseases.
  • Year-round growth: Can be used indoors with grow lights.
  • Higher yields: More plants can be grown in a small space.


Hydroponic towers are also environmentally friendly. They reduce the need for pesticides and herbicides, making them a sustainable choice for growing food.


Different Types Of Hydroponic Towers


Several types of hydroponic towers are available. Each has its features and benefits. Here are some common types:


  • Nutrient Film Technique (NFT): A thin film of nutrient solution flows over the roots.
  • Aeroponic Towers: Roots are misted with nutrient solution.
  • Drip Systems: The nutrient solution drips onto the base of each plant.
  • Wicking Systems: A wick draws nutrient solution to the roots.


Choosing the right type depends on your needs. NFT systems are great for leafy greens, aeroponic towers work well for herbs and small fruits, drip systems are versatile and easy to set up, and wicking systems are simple and low-maintenance.


Each type has pros and cons. Understanding them can help you make the best choice for your garden. Hydroponic towers can be a fun and rewarding way to grow plants at home.


Components Of A Hydroponic Tower


Hydroponic towers are a modern method of growing plants without soil. They use water and nutrients to feed the plants. They are perfect for small spaces and urban areas. The main parts of a hydroponic tower include the reservoir, pump, growing tubes, growing medium, and nutrient solution.


Reservoir


The reservoir is the base of the hydroponic tower. It holds the water and nutrient solution. This is where the plants get their nutrients from. The reservoir should be big enough to have enough water for all the plants. It should be easy to clean and maintain.


Essential features of a reservoir:


  • It must be leak-proof.
  • It should be made of food-grade materials.
  • It should have a cover to prevent algae growth.


A good reservoir ensures that plants get all the nutrients they need and helps maintain the right water level in the system.


Pump


The pump moves the water and nutrients from the reservoir to the plants. It is a crucial part of the hydroponic system. Without a pump, the plants would not get their nutrients. The pump should be reliable and energy-efficient.


Critical aspects of a pump:


  • It should have a reasonable flow rate.
  • It should be easy to maintain.
  • It should be durable and long-lasting.


The pump ensures that the nutrient solution circulates through the system, helping to keep the plants healthy and growing.


Growing Tubes


The growing tubes, usually made of plastic or PVC, hold the plants in the hydroponic tower. The tubes have holes where the plants are placed. The nutrient solution flows through these tubes, feeding the plants.


Essential features of growing tubes:


  • They should be sturdy and durable.
  • They should be easy to clean.
  • They should have enough space for the plants to grow.


The growing tubes ensure that the plants get enough nutrients and help support them as they grow.


Growing Medium


The growing medium holds the plants in place. It is used instead of soil in hydroponic systems. The medium supports the plant roots and helps them absorb nutrients. Common growing mediums include rock wool, clay pellets, and coconut coir.


Benefits of using a growing medium:


  • It provides good support for the plants.
  • It helps retain moisture and nutrients.
  • It is easy to clean and reuse.


The growing medium ensures that the plants stay upright and healthy. It also helps the roots get the nutrients they need.


Nutrient Solution


The nutrient solution is a mix of water and essential nutrients. It feeds the plants in the hydroponic tower. The solution should have the right balance of nutrients for the plants to grow well.


Essential nutrients in the solution:


  • Nitrogen for leaf growth.
  • Phosphorus for root development.
  • Potassium for overall health.


A good nutrient solution ensures the plants get all the necessary elements. It helps them grow strong and healthy in the hydroponic system.


How Do Hydroponic Towers Work


How Hydroponic Towers Work


Hydroponic towers are an innovative way to grow plants without soil. They use water and nutrients to nourish the plants. This method is efficient and space-saving. Many people are adopting hydroponic towers for home gardens. Understanding how they work can help you get started.


Circulation Of Nutrient Solution


Water and nutrients circulate through the hydroponic tower. A pump moves the solution from a reservoir to the top of the building. Gravity then pulls the solution down. The plants absorb nutrients as the solution flows by. This cycle repeats to ensure plants get a constant supply of nutrients.

Here are the key steps:


  • Pumping: The pump pushes the nutrient solution to the top.
  • Flowing Down: Gravity makes the solution flow down through each plant level.
  • Collecting: The solution collects back in the reservoir.


This continuous cycle keeps the plants healthy. It also ensures they get the right amount of nutrients. The system is simple but effective.


Distribution Of Nutrient Solution


The nutrient solution needs to be evenly distributed, which is crucial for plant growth. Each level of the tower has openings, which allow the solution to reach the plant roots. The design ensures all plants get their share of nutrients.


The distribution process involves:


  • Openings: Each level has openings for the solution to pass through.
  • Even Spread: The solution spreads evenly across the roots.
  • Constant Flow: A consistent flow is maintained to avoid nutrient deficiency.


This method prevents any plant from getting too much or too little. It ensures balanced growth for all plants in the tower. The even distribution is vital to a successful hydroponic tower garden.


Plant Uptake Of Nutrients


Plants absorb nutrients from the solution through their roots, which are exposed to nutrient-rich water. They take in the necessary minerals and elements. This process is similar to how plants get nutrients from soil.


Setting Up A Hydroponic Tower


Hydroponic towers are a revolutionary way to grow plants without soil. They use nutrient-rich water solutions to nourish plants, allowing them to grow faster and healthier. Setting up a hydroponic tower can be a fun and rewarding project. It involves choosing the right location, assembling the tower, adding the nutrient solution, planting the seeds, and maintaining the tower.


Choosing The Right Location


Choosing the right location is crucial for the success of your hydroponic tower. The location should receive ample natural sunlight. Plants need at least 6 hours of sunlight each day. Avoid placing the tower in areas with extreme temperatures. The ideal temperature range is between 65°F and 75°F. Ensure that the location has electricity access if you use a pump or grow lights.


Here are some key points to consider when choosing the location:


  • Sunlight: At least 6 hours per day.
  • Temperature: Between 65°F and 75°F.
  • Electricity: For pumps or lights.
  • Accessibility: Easy to reach for maintenance.


Placing the tower in a greenhouse or a sunroom can be ideal. These locations offer controlled environments that can enhance plant growth. Avoid placing the tower in windy areas, as it can cause physical damage to the plants.


Assembling The Tower


Assembling the hydroponic tower is straightforward. Start by unpacking all the parts and laying them out. Then, follow the manufacturer's instructions for assembly. Most towers come with a base, central column, and plant holders.


The steps to assemble the tower are as follows:


  1. Attach the base: Ensure it is stable and level.
  2. Connect the central column: This is where the nutrient solution will flow.
  3. Install the plant holders: These hold the plants in place.
  4. Set up the pump: If your tower uses a pump, connect it to the base.


It's essential to check that all connections are secure. Any leaks can affect the tower's performance. Make sure to test the system with water before adding the nutrient solution. This ensures that everything is working correctly.


Adding The Nutrient Solution


Adding the nutrient solution is a critical step. The solution provides all the essential nutrients that plants need. Most hydroponic systems use a balanced nutrient mix, which usually contains nitrogen, phosphorus, potassium, and trace minerals.


Steps to add the nutrient solution:


  1. Fill the reservoir: Use clean, room-temperature water.
  2. Add the nutrient mix: Follow the manufacturer's instructions for dosage.
  3. Stir the solution: Ensure that the nutrients are well-dissolved.
  4. Test the pH: The ideal pH range is between 5.5 and 6.5.


It's important to monitor nutrient levels regularly. Plants consume nutrients as they grow, so the solution needs to be replenished. Use a TDS meter to check the concentration of nutrients in the water. This helps maintain optimal growing conditions for the plants.


Planting The Seeds


Planting the seeds is where the fun begins. Start by choosing the right seeds for your hydroponic tower. Leafy greens, herbs, and small fruits are excellent choices. Ensure that the seeds are of good quality and suitable for hydroponic systems.


Steps to plant the seeds:


  1. Soak the seeds: Some seeds may need soaking before planting.
  2. Place the seeds in grow plugs: Grow plugs are small, spongy materials that hold the seeds.
  3. Insert the grow plugs into the plant holders. Ensure they are secure.
  4. Water the seeds lightly: This helps in germination.


It's essential to keep the seeds moist during the germination period. Use a spray bottle to mist them lightly. Ensure that the tower is in a well-lit area to provide the necessary light for germination. Once the seeds sprout, they will start to increase.


Maintaining The Tower


Maintaining the hydroponic tower is crucial for healthy plant growth. Regular maintenance ensures that the system runs smoothly and efficiently. Key maintenance tasks include checking the nutrient solution, cleaning the system, and inspecting the plants.


Here are some maintenance tips:


  • Check nutrient levels: Replenish as needed.
  • Clean the system: Prevent algae and bacteria buildup.
  • Inspect plants: Look for signs of pests or diseases.
  • Adjust pH levels: Ensure they remain in the optimal range.


It's also essential to trim the plants as they grow. This encourages healthy growth and prevents overcrowding. Regularly check the pump and other mechanical parts to ensure they function correctly. Keeping a maintenance log can be helpful. It allows you to track the health and progress of your plants.


Frequently Asked Questions


How Does A Hydroponic Grow Tower Work?


A hydroponic grow tower uses a vertical structure to grow plants. It circulates nutrient-rich water to plant roots, promoting growth. The system saves space and water while providing optimal conditions for plants to thrive.

Do Hydroponic Towers Run All The Time?


Hydroponic towers typically run continuously to ensure plants receive constant nutrients and water. Some systems may use timers.


What Is The Principle Of Hydroponic Tower?


The principle of a hydroponic tower involves growing plants vertically without soil. Nutrient-rich water circulates through the system, providing essential nutrients directly to the plant roots. This method maximizes space and promotes efficient growth.


Are Hydroponic Towers Worth It?


Yes, hydroponic towers are worth it. They save space, use less water, and produce healthy plants quickly, making them ideal for urban gardening.


Conclusion


Hydroponic towers offer a sustainable way to grow plants. They use minimal water and space, making them efficient. By understanding their workings, you can optimize plant growth. Embrace this innovative method for a greener future.


Read More Articles:


Outdoor Living Decorating Ideas for Real Backyards

 I’ve seen too many “perfect backyard setups” online that look nice in pictures but don’t really work in real life. In my experience, outdoo...