The home and garden are dedicated to improving and beautifying living spaces inside and out. This niche contains home essentials, lawn care and landscaping advice, and gardening techniques. It aims to help individuals create attractive, functional, and personalized environments, enhancing their homes and outdoor areas. Whether maintaining a lush lawn, cultivating a garden, or embarking on a DIY project, this niche provides valuable insights and inspiration to elevate your living spaces.
How to Select Hand Tools for Raised Bed Gardening: A Simple Guide
Choose hand tools for raised bed gardening based on bed depth, soil type, planting space, handle comfort, and the jobs you do most often. Start with a sturdy trowel, hand cultivator, weeder, pruners, and watering tool, then add specialty tools as your garden grows.
Across the United States, raised beds help gardeners grow vegetables in small backyards, suburban lots, community gardens, and urban patios. A raised bed in Georgia may hold warm, sandy soil, while one in Ohio may contain a rich compost blend that stays damp after spring rain. The right hand tools make these different growing spaces easier to manage without wasting money on equipment that rarely gets used.
Selecting tools is about more than finding a small shovel with a comfortable grip. You need to consider the depth of your bed, the crops you grow, the texture of your soil, and the space between plants. A narrow trowel can fit between lettuce seedlings, while a broad scoop may work better for moving potting mix or compost.
The best starting point is a short list of useful tools that can handle several routine jobs. Look for solid construction, a handle that fits your hand, and a head that matches your soil and planting needs. You can build a larger collection later, once you know which tasks take the most time in your garden.
Source: www.pinterest.com
Understand Your Raised Bed Before Buying Tools
Examine your raised bed before choosing tools. Its dimensions, soil depth, construction, and planting layout all affect which tools will work well. A compact patio bed calls for different equipment than a long vegetable bed with wide paths around it.
Raised beds often contain a mix of topsoil, compost, and other organic matter. This blend may be loose and easy to work, but repeated watering, foot pressure, or poor drainage can create compacted areas. Choose tools for the soil you actually have rather than assuming every raised bed is soft.
Think about the crops you plan to grow throughout the season. Lettuce, radishes, carrots, and spinach may require careful work among closely spaced plants. Tomatoes, peppers, and squash often need more room around their stems, along with pruning and support as they grow.
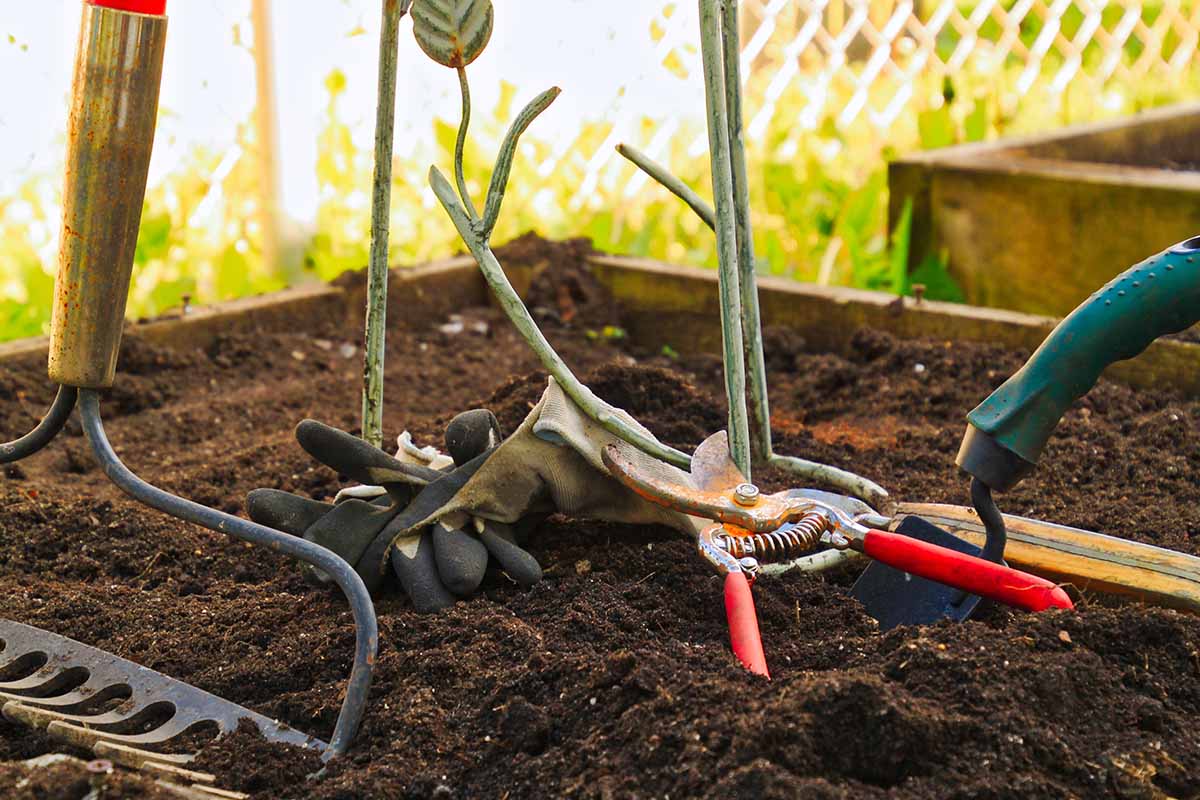
Source: gardenerspath.com
Bed depth
Shallow beds may need short tools for planting and light cultivation. Deeper beds can accommodate longer trowels or narrow digging tools when you need to reach farther into the soil.
Soil texture
Loose compost-rich soil is usually easy to work with a light trowel. Dense clay-rich soil may need a stronger tool, but a hand tool is not a substitute for correcting serious compaction or poor drainage.
Plant spacing
Closely planted crops benefit from narrow tool heads that reduce disturbance to nearby roots. Widely spaced crops leave more room for broader scoops and cultivators.
Access and reach
A wide bed may require longer handles if you cannot reach its center comfortably. Avoid leaning heavily on the bed frame or stretching across plants to reach the far side.
Measure Reach and Working Space
Measure the bed width and consider how you will reach its center from the paths. If you can comfortably reach every planting area from the sides, short-handled tools may be enough. If the center is difficult to access, consider a narrow tool with a longer handle or a different bed layout.
Test your reach while standing or sitting in the position you normally use for gardening. Your shoulders should stay relaxed, and you should not need to twist your back sharply to work around plants. A tool that reaches farther is useful only if it remains easy to control.
For narrow beds
Choose compact tools that let you work from the sides without bumping the frame.
For wide beds
Consider extended-reach hand tools or improve access before planting dense rows.
Choose the Essential Hand Tools First
Build your collection around the jobs you repeat each week. Most small raised beds need tools for planting, loosening the soil surface, removing weeds, trimming damaged growth, and watering. Buying these essentials first keeps your setup useful without filling a storage bin with rarely used gadgets.
A good tool should perform its intended job without forcing you to grip too tightly or push harder than necessary. Check that the head feels secure, the handle has no sharp edges, and moving parts operate smoothly. A sturdy, simple design is often more useful than a tool with several features you will not use.
Source: gardeningask.com
Garden trowel
Use a trowel to dig planting holes, transplant seedlings, scoop loose soil, and add compost to individual plants.
Hand cultivator
Use a small cultivator with prongs to loosen the upper soil layer, break light surface crusts, and mix amendments into the top layer.
Hand weeder
Choose a narrow weeding tool for removing small weeds near vegetables while limiting disturbance to nearby roots.
Pruning shears
Use bypass pruning shears to cut suitable green stems, remove damaged growth, and harvest crops with firm stems. Keep the cutting capacity within the manufacturer's limits.
Watering tool
A watering can with a gentle rose or a hose wand with an adjustable spray helps deliver water without washing soil away or flattening seedlings.
Garden gloves
Choose gloves that fit well and allow you to feel small seeds, stems, and weeds. Gloves should support the work rather than make delicate tasks harder.
Why a Trowel Is Usually the First Purchase
A trowel handles many small jobs in a raised bed. Its narrow blade can make a hole for a transplant, lift a small plant with some soil around its roots, or move compost from a bucket into a planting area. For many beginners, this versatility makes it the most useful first tool.
Look for a blade that is rigid enough for ordinary planting and a handle that gives you a secure grip. A narrow blade is useful in crowded beds, while a wider scoop moves loose soil more quickly. If your bed contains stones or dense soil, avoid twisting the blade sideways to pry out large objects because this can bend or damage it.
Best for precision
A narrow, pointed trowel helps you place transplants and dig small holes between established plants.
Best for moving loose material
A broader scoop can transfer compost, potting mix, or loose soil with fewer trips.
When to Add a Hand Cultivator
A hand cultivator is useful when the soil surface becomes crusted or when you need to work a small amount of compost into the top layer. Its prongs can loosen soil between rows and help remove very small weeds before they establish deep roots.
Use shallow strokes around vegetables because many crops have fine roots near the surface. Deep, forceful cultivation can damage those roots and disturb moisture near the plant. If the soil is wet enough to smear or clump heavily, wait until it becomes workable rather than digging through it.
Choose sturdy prongs
The prongs should remain aligned during normal work and should not wobble at the connection to the handle.
Match the width to the bed
A narrow head works between closely spaced plants, while a wider head covers open soil more quickly.
Compare Tool Materials and Construction
Material affects a tool's weight, maintenance needs, resistance to rust, and ability to handle force. A tool that looks strong in a product photo may still have a weak joint or an uncomfortable handle. Check the complete design rather than judging it by the blade material alone.
Steel heads are common because they can handle ordinary digging, cutting, and cultivation tasks. Stainless steel resists rust better than many ordinary steels, but it can still stain or corrode under some conditions. Carbon steel can be strong and easy to sharpen, yet it needs regular drying and suitable care to limit rust.
Aluminum and some lightweight alloys can reduce tool weight, which may help during long gardening sessions. However, not every lightweight head is suited to heavy prying or dense soil. Use each tool within its intended limits instead of treating light weight as proof of better design.
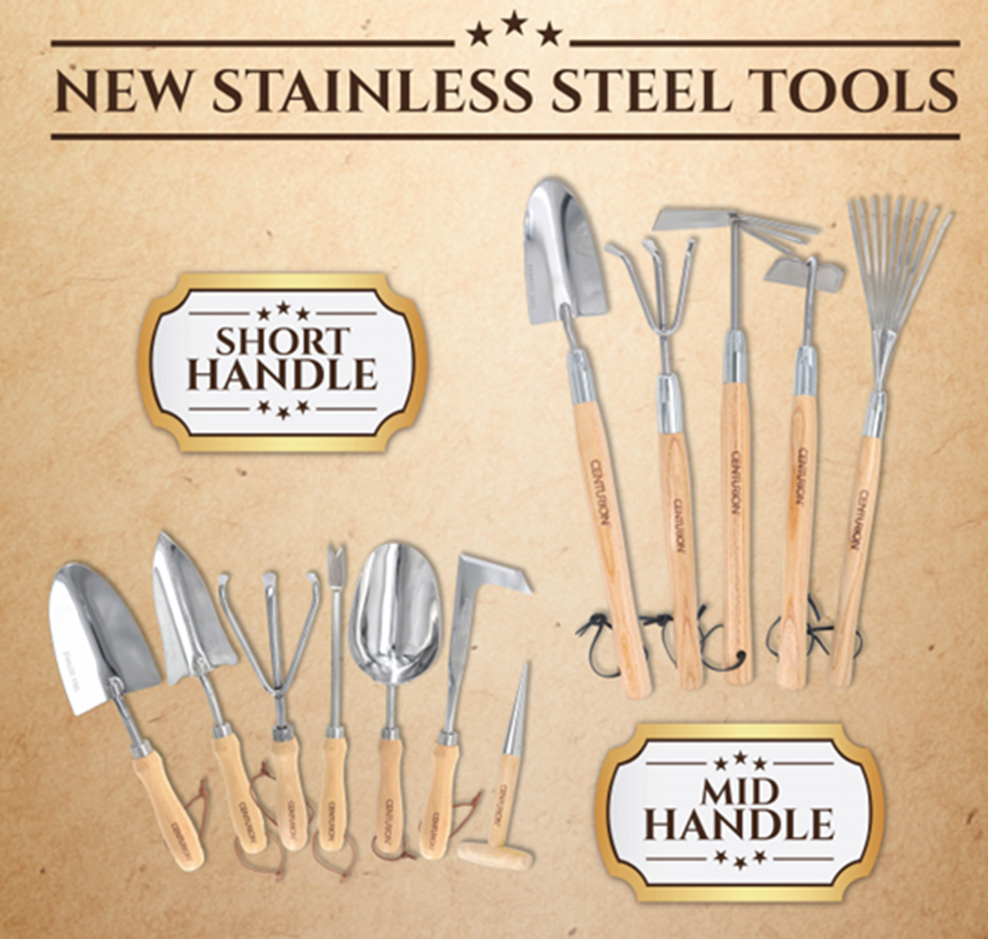
Source: centurionbrands.com
Carbon steel
Often suitable for sturdy digging and cutting tools, but dry it after use and protect it from prolonged moisture.
Stainless steel
Offers good corrosion resistance for many garden tasks. It still needs cleaning, especially after contact with fertilizer, plant sap, or wet soil.
Aluminum or lightweight alloys
Can reduce carrying weight, but check the manufacturer's intended use before applying strong leverage.
Wood handles
Can feel warm and natural in the hand. Inspect for splinters, cracks, and loose joints, and keep the handle dry between uses.
Plastic or composite handles
May resist moisture and reduce weight. Check for a secure connection, a comfortable grip, and signs of cracking or brittleness.
Inspect the Joint Between the Head and Handle
The connection between a tool head and its handle is a key point to inspect. A loose joint can make the tool harder to control and may cause the head to shift during use. Hold the tool firmly and check for movement before buying it.
Look for smooth edges, solid fasteners, and a head that sits straight. If a tool uses replaceable parts, confirm that replacements are available and designed for the exact model. Repairability can matter more over time than a small difference in purchase price.
Reject loose parts
Avoid tools whose heads move at the joint or whose handles show cracks near fasteners.
Check the finish
Look for burrs, rough seams, sharp plastic edges, and exposed areas that could irritate your hand.
Select Handles for Comfort and Control
A comfortable handle helps you work with less strain and better control. Handle shape, length, diameter, grip texture, and overall tool weight all influence how the tool feels during repeated use. What feels comfortable in a store may feel different after an hour of planting, so test the grip whenever possible.
A handle should fit your hand without forcing your fingers to stretch too far or press tightly into the palm. Smooth handles can become slippery when wet, while very rough grips may rub against the skin. Choose a surface that feels secure with dry hands and remains manageable when you wear gardening gloves.
Longer handles can reduce the need to reach into the center of a bed, but they may be awkward in tight spaces. Short handles offer precise control around small seedlings but often require you to bend or kneel. Select the length that suits both the bed and your normal working posture.
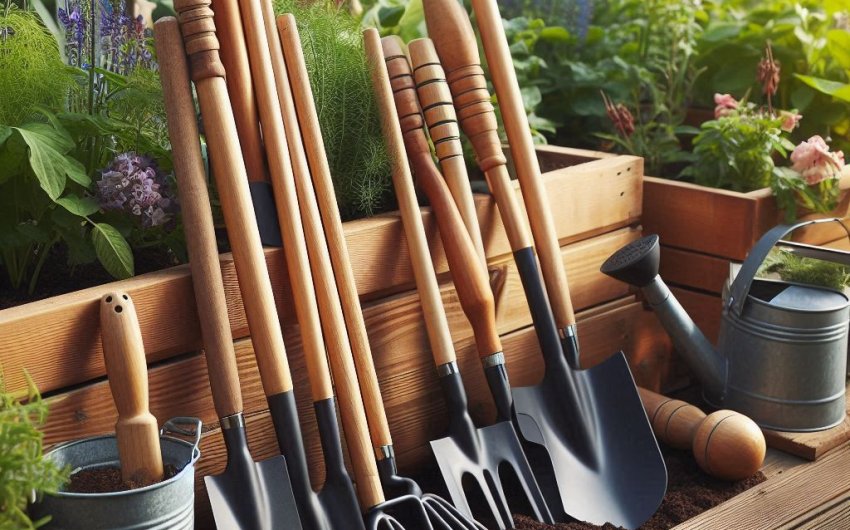
Source: lawnvibe.com
Grip size
Choose a diameter that lets your fingers close comfortably around the handle without excessive squeezing.
Grip texture
Look for a secure surface that does not slip easily or create painful pressure points.
Tool balance
A tool should feel balanced enough to guide accurately without making your wrist work hard to control the head.
Handle length
Short handles suit precise planting and weeding. Extended handles help reach farther, but only if you can control the tool without striking plants or the bed frame.
Choose Tools for Long Gardening Sessions
If you tend several beds or spend a long time weeding, comfort deserves extra attention. Consider the total weight of the tool, the force needed to use it, and whether its shape allows a relaxed wrist position. A lighter tool may help, but only if it remains strong enough for the job.
Try alternating tasks instead of spending an entire session on repetitive hand movements. Move from planting to watering or crop inspection, and take breaks when your hands become tired. Stop using a tool if you develop pain, numbness, or a loss of grip control.
For frequent kneeling
Use tools with grips that are easy to find and hold without looking down for long periods.
For reduced hand strength
Consider wider, cushioned grips and lightweight tools that require less force, then test them to confirm they are easy to control.
Match Tools to Soil Type and Gardening Tasks
Soil type determines how much force a hand tool needs to move soil or remove weeds. Loose, well-structured soil is easier to work than dense clay or soil packed by repeated pressure. Choose the smallest tool that performs the job safely, and address soil problems rather than trying to overpower them.
Before cultivating, squeeze a small handful of soil. Soil that crumbles when gently pressed is often easier to work than soil that sticks together in a wet lump or forms a hard, dry mass. This simple check is not a laboratory test, but it can help you decide whether to wait before digging.
Raised beds allow you to manage soil structure with compost, suitable organic matter, and careful watering. Hand tools can help maintain that structure, but repeated deep digging is not always necessary. In established beds, shallow cultivation and targeted planting often cause less disturbance.
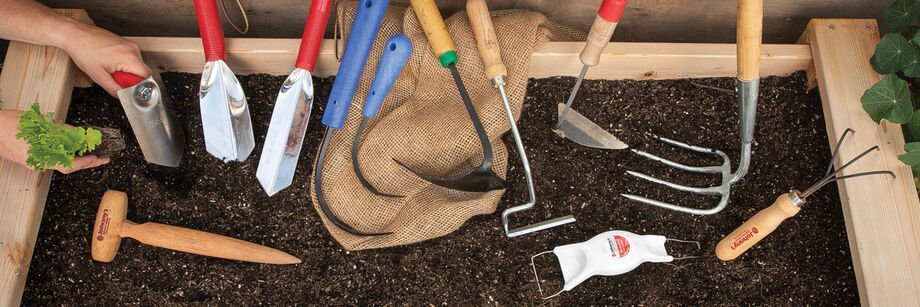
Source: prod-na02.johnnyseeds.com
Loose, compost-rich soil
Use a light trowel and small cultivator for planting, light mixing, and removing shallow weeds.
Clay-rich soil
Use a sturdy trowel for normal planting when the soil is workable. Avoid digging when clay is very wet or extremely hard and dry.
Rocky soil
A strong, narrow planting tool may help with small obstructions, but do not twist a thin blade against large stones.
Mulched beds
Use a narrow trowel or weeder to open small planting spaces while keeping the mulch layer mostly in place.
Use the Right Tool for Weeding
Choose a weeder based on the size and rooting pattern of the weeds. Small, shallow weeds can often be removed with fingers or a narrow hand tool. Weeds with long taproots may need a deeper, pointed weeder that can loosen soil around the root.
Remove weeds when the soil is moist enough to release their roots but not so wet that it becomes muddy. Grip the weed near its base and ease the root out without pulling hard enough to disturb neighboring crops. If a weed breaks, use a suitable tool to loosen the remaining root when practical.
For weeds that spread by underground runners or rhizomes, removing the visible top may not solve the problem. Work carefully to avoid breaking and scattering root pieces, and follow local guidance for invasive species. Some persistent weeds need repeated removal or a different control method.
Shallow-rooted weeds
Use fingers, a narrow hoe, or a small cultivator to remove seedlings before they become established.
Taprooted weeds
Use a pointed weeder to loosen the soil alongside the root and lift it out with less force.
Weeds near crop stems
Work slowly and keep the tool shallow to reduce the chance of cutting vegetable roots.
Choose Tools for Seeds and Transplants
A trowel and a small dibber can cover most planting needs. A dibber is a pointed tool used to make holes for seeds, bulbs, or seedlings, depending on its design and the crop. It is especially useful when you want consistent planting holes without moving much soil.
Seed size and crop instructions determine planting depth. Small seeds often need shallow placement, while larger seeds may need deeper holes. Use a ruler or a marked dibber when accurate depth matters, and follow the seed packet rather than guessing from the size of the tool.
For transplants, make a hole wide enough to fit the root ball without forcing it into place. Set the plant at the depth recommended for that crop, fill around the roots, and water gently to settle the soil.
Dibber
Useful for making small, repeatable holes for direct sowing or transplanting when its shape suits the crop.
Narrow trowel
Helps transplant seedlings in tight spaces and move a small amount of soil around their roots.
Hand scoop
Useful for moving loose planting mix or compost without carrying a large shovel into the bed.
Compare Common Hand Tools Before You Buy
Compare tools by task, control, strength, and maintenance rather than by the number of features. A simple tool that suits your bed may do more useful work than a large kit filled with duplicate items. The table below provides a practical starting point for a beginner's collection.
The ratings in this table are general use descriptions, not laboratory measurements or product rankings. Actual performance depends on the tool's design, material, soil conditions, and how you use it.
Source: lawnvibe.com
Buy for repeated tasks
If you transplant vegetables every week, prioritize a trowel before buying specialty tools for occasional jobs.
Check replacement options
For tools with blades, springs, or other moving parts, check whether the maker offers suitable replacement parts.
Avoid duplicate functions
Two nearly identical cultivators may add little value if one already handles your usual work.
Which Hand Tools Should Beginners Buy First?
For a small vegetable bed, begin with one sturdy trowel, one hand cultivator, and one weeder suited to the weeds you encounter. Add pruning shears if you grow crops that need trimming or have stems that require clean cuts. A watering can or hose wand should deliver a gentle flow that suits seedlings and the bed's size.
A pair of gloves and a small storage tub can round out the basic setup. The tub keeps tools together while you work and helps prevent sharp tools from getting lost among mulch or soil. You do not need every tool before planting your first seeds.
First purchase
Choose a trowel that fits your hand and can dig ordinary planting holes without bending.
Second purchase
Add a narrow weeder or cultivator based on whether weeds or surface soil work takes more of your time.
Later additions
Buy pruning shears, a dibber, or extended-reach tools when your crops and layout create a real need.
Plan a Practical Hand Tool Budget
Set your budget around the jobs you need to complete rather than buying a large collection at once. A few sturdy, comfortable tools are enough for many home raised beds. You can add specialty items after a full growing season reveals which tasks take the most effort.
Prices vary by material, design, brand, and retailer, so compare current local offers instead of relying on a fixed price range. A higher price does not automatically mean better performance, and the cheapest tool may cost more over time if the head bends or the handle fails during normal use.
Consider repair and replacement costs as part of the purchase. A tool with a replaceable blade, spring, or handle may be easier to maintain than one that must be discarded after a small part fails. If you garden only a few times each month, a simple tool may be more practical than a specialized professional model.
Source: www.pinterest.com
Essential budget
Cover a trowel, weeder or cultivator, gloves, and a way to water gently before purchasing extras.
Comfort budget
Spend more attention on handle fit, balance, and ease of use if you garden often or have trouble gripping small handles.
Long-term value
Compare construction, repair options, corrosion resistance, and the availability of replacement parts.
Tool Sets Versus Individual Tools
A tool set can be convenient when you are starting from scratch, especially if it includes several genuinely useful tools. However, sets may include small accessories or duplicate tools that do not suit your bed. Check each item and its construction before deciding that a bundle offers better value.
Buying individually gives you more control over handle fit, head shape, and material. It can also help you replace a worn tool without buying an entire set again. For many gardeners, purchasing the essential tools first and adding items later is the more flexible approach.
Choose a set when
It includes the core tools you need, has consistent build quality, and costs less than buying those items separately.
Choose individual tools when
You need a particular handle size, a specific weeder, or a tool designed for your soil and crop layout.
Use Hand Tools Safely in Raised Beds
Safe tool use starts with choosing the correct tool for the task and checking it before each session. A loose head, cracked handle, damaged blade, or slipping grip can make ordinary garden work harder to control. Repair or replace damaged tools before returning them to use.
Keep sharp tools pointed away from your body and nearby people. When cutting stems, secure the branch or stem if practical and keep your fingers clear of the blade path. Never use pruning shears to cut material thicker or harder than the tool is designed to handle.
Raised beds can encourage awkward reaching because the soil sits above ground level. Work from stable paths, avoid standing on the bed frame unless it is designed to support your weight, and move around the bed instead of leaning far across it. Wet boards, loose gravel, and hoses can also create slipping or tripping hazards.
Source: gardenbotany.com
Wear suitable protection
Use gloves for rough soil and plant material, eye protection when debris could fly, and closed-toe footwear that provides stable footing.
Control the cutting edge
Keep blades sharp and clean, use the proper cutting motion, and close or lock pruning tools before storing them.
Avoid excessive force
Do not use a small trowel as a pry bar or force a hand cultivator through hard soil.
Store tools safely
Keep sharp tools in a designated container or rack, away from children and pets.
Know When a Hand Tool Is Not Enough
Hand tools are designed for small-scale work, not every digging or cutting job. If you encounter large stones, thick woody roots, a badly compacted layer, or a heavy structural problem with the bed, stop and choose an appropriate method. Forcing a small tool can damage the tool and cause a sudden slip.
For a bed with serious drainage problems, inspect the bed design and soil composition rather than repeatedly digging deeper. If a frame is leaning, splitting, or failing, address the structural issue before continuing to work near it. Use appropriate full-size equipment or seek qualified help when the task exceeds your tools or ability.
Hard or compacted soil
Check moisture and soil structure first. Use an appropriate digging tool or correct the underlying problem instead of repeatedly forcing a hand tool.
Large roots or branches
Use a cutting tool rated for the material and its diameter, or seek suitable assistance for work that is beyond your equipment.
Clean and Maintain Tools After Gardening
Regular care helps hand tools stay easier to use and reduces the chance of rust, stuck moving parts, and damaged handles. Soil left on a blade can hold moisture, while plant sap may make pruning shears sticky. A short cleanup after each session is usually easier than removing a thick layer of dried dirt later.
Brush or rinse away soil, then dry metal parts thoroughly. Use water sparingly on wooden handles and let them dry before storage. If you use a disinfectant on pruning tools because of suspected plant disease, follow the product label and avoid spreading contaminated sap or debris between plants.
Inspect tools as you clean them. Look for cracks, loose fasteners, bent heads, worn springs, and cutting edges that no longer make clean cuts. Follow the manufacturer's directions for sharpening and lubrication, since different metals, coatings, and moving parts may need different care.
Source: ugaoo.com
Remove dirt
Use a stiff brush to remove soil from trowels, cultivators, and weeders before it hardens.
Dry metal parts
Wipe blades and heads dry before storing them to reduce corrosion, especially after wet weather.
Maintain cutting tools
Clean pruning blades, inspect the pivot, and sharpen them according to the manufacturer's instructions.
Check handles
Replace or repair handles that split, loosen, or develop sharp splinters.
Store Tools Within Easy Reach
Store frequently used hand tools in a dry place near the garden, such as a protected shed, cabinet, or covered storage box. A dedicated rack or tool caddy keeps blades from rubbing against one another and makes it easier to notice missing items. If you use an outdoor storage box, make sure it does not trap moisture.
Keep pruning shears closed or locked and place sharp tools where children cannot reach them. Avoid leaving tools in the bed, where watering, rain, and soil can cause corrosion or hide sharp edges beneath mulch. A consistent storage spot also makes it easier to prepare for the next gardening session.
Use a tool caddy
Keep a trowel, weeder, gloves, and pruners together so you can carry them between beds.
Separate sharp edges
Use covers or dedicated storage slots to protect blades and reduce accidental cuts.
Frequently Asked Questions
Q
What are the most important hand tools for raised bed gardening?
A sturdy trowel, hand cultivator, weeder, pruning shears, and a suitable watering tool cover many routine jobs. Add gloves and a small tool caddy for comfort and organization. Your crop choices and soil conditions may change which tool deserves priority.
Q
Are stainless steel garden tools better than carbon steel tools?
Neither material is automatically better for every gardener. Stainless steel generally offers better resistance to rust, while carbon steel can provide a strong working edge but needs careful drying and maintenance. Compare the full tool design, handle, head thickness, joint strength, and intended use before deciding.
Q
Do I need long-handled tools for a raised garden bed?
Not always. Short-handled tools provide good control in compact beds and around closely spaced vegetables. Long-handled or extended-reach tools can help when the bed is wide or you want to reduce bending, but they should remain easy to guide without striking plants or the frame.
Q
How many hand tools should a beginner buy?
Start with three or four core tools that match your main tasks, rather than buying a large kit. A trowel, weeder or cultivator, and watering tool cover much of the basic work. Add pruning shears or a dibber when your crops create a clear need.
Q
How can I prevent hand tools from rusting?
Brush off soil, wipe metal surfaces dry, and store tools in a dry place. Avoid leaving tools outside or in wet soil between gardening sessions. Follow the manufacturer's instructions for lubrication, sharpening, and care of coated or stainless steel parts.
Q
Can I use ordinary hand tools in a raised bed filled with clay soil?
Yes, if the soil is workable and the tool is strong enough for the task. Avoid working clay when it is very wet because it can smear and compact, or when it is extremely dry and hard because forcing tools may damage them. Improve soil structure gradually and use a suitable digging tool when a small trowel is not enough.
Q
How do I choose a garden tool for small hands or weak grip strength?
Look for a handle that fits comfortably, a balanced tool, and a weight you can manage without squeezing hard. Wider or cushioned grips may help some gardeners, but fit varies from person to person. Test the tool if possible and stop if it causes pain, numbness, or loss of control.
✦ Wrapping Up
Conclusion
Selecting hand tools for raised bed gardening starts with understanding your bed, soil, crops, and working habits. A compact trowel, suitable weeder, hand cultivator, pruning shears, and gentle watering tool will handle many everyday tasks. Focus on secure construction, comfortable handles, and tool heads that fit the available space.
You do not need an expensive collection to grow healthy vegetables. Choose a few versatile tools, learn how they work in your soil, and add specialty equipment only when a recurring task calls for it. Clean and inspect each tool after use, and store sharp edges safely so your collection stays ready for the next planting day.
💡 Key Takeaway
Before buying another garden tool, list your three most common raised bed tasks, measure the space you need to reach, and test the handle and head of each tool against those needs. Start with a sturdy trowel, a weeder or cultivator, and a gentle watering tool, then expand your collection as your garden grows.






No comments:
Post a Comment