The home and garden are dedicated to improving and beautifying living spaces inside and out. This niche contains home essentials, lawn care and landscaping advice, and gardening techniques. It aims to help individuals create attractive, functional, and personalized environments, enhancing their homes and outdoor areas. Whether maintaining a lush lawn, cultivating a garden, or embarking on a DIY project, this niche provides valuable insights and inspiration to elevate your living spaces.
How To Maintain Garden Tools After Rainy Weather: Easy Care
To maintain garden tools after rainy weather, remove wet soil and plant debris, wash off dirt, dry every part well, check for rust or damage, apply a thin coat of suitable oil to bare metal, and store the tools in a dry, covered place.
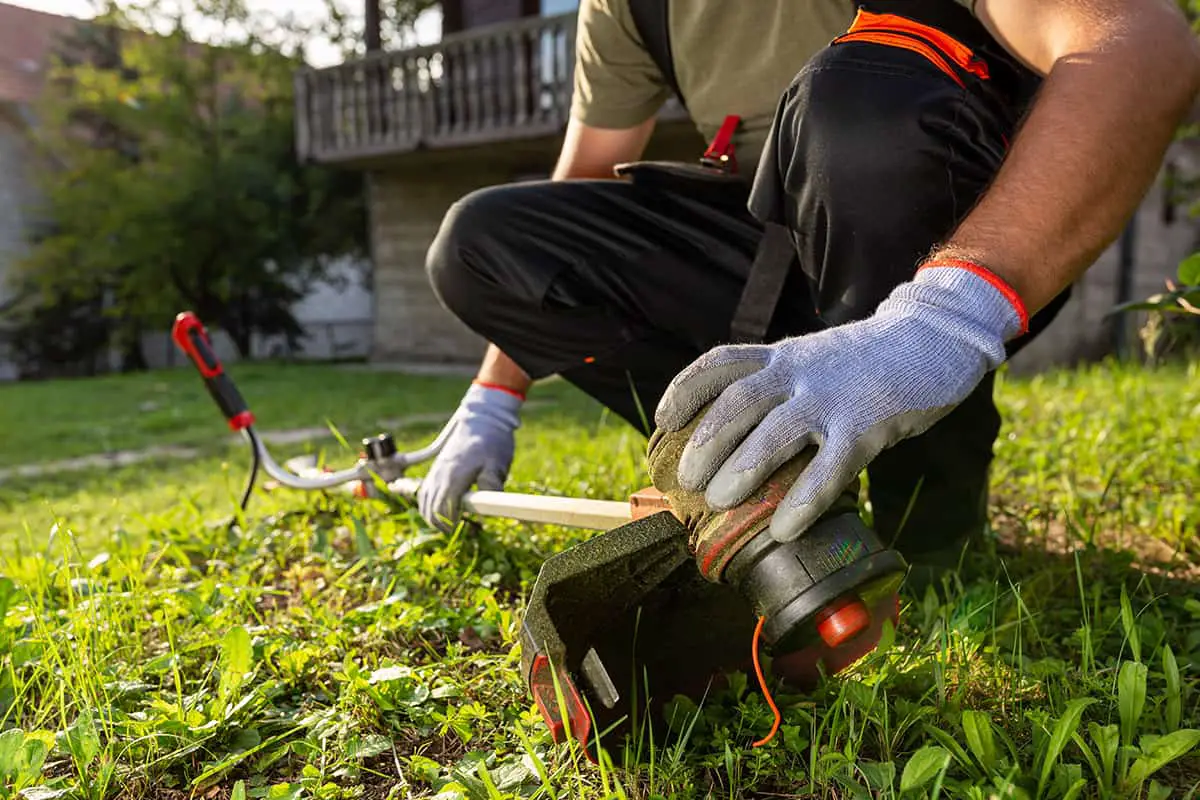
Rain can turn a quick gardening job into a cleanup task. In many parts of the United States, spring showers, summer storms, and fall rain leave shovels, hoes, pruners, and rakes wet and muddy. If you put these tools away without cleaning them, damp soil and trapped water can lead to rust, stiff joints, loose handles, and dull cutting edges.
Good garden tool care does not need a long list of supplies or hours of work. A bucket of water, a stiff brush, a clean rag, and the right maintenance oil can handle most routine jobs. The key is to clean and dry each tool soon after use, then check the parts that need extra care.
The right method depends on the tool. A steel shovel can handle a different cleaning routine from a bypass pruner with a spring and pivot joint. Wooden handles also need different care from fiberglass or plastic ones. This guide explains how to care for each type, how to deal with early rust, and how to store tools so they are ready for the next dry day.
Source: greenlawnora.com
Why Garden Tools Need Extra Care After Rain
Water alone does not ruin every garden tool, but moisture left on metal creates conditions that can encourage corrosion. Ordinary carbon steel is especially vulnerable when water and oxygen remain on its surface. Dirt, plant sap, and fertilizer residue can make cleanup harder and may hold moisture against the metal.
Wet soil also sticks to shovel blades, hoe heads, trowel surfaces, and rake teeth. Once the soil dries, it can become much harder to remove. A dirty tool may then cut poorly, move less freely, or spread unwanted plant material from one part of the garden to another.
Rain can affect handles and moving parts, too. Repeated wetting and drying may contribute to swelling, shrinking, cracking, or loosening in wooden handles. Water and grit around a pruner's pivot can make the tool harder to open and close.
A short cleanup after each rainy gardening session can prevent many of these problems. It also gives you a chance to spot damage before a loose head, cracked handle, or stuck blade causes trouble.
Source: stickymudandbellylaughs.com
Rust on exposed steel
Moisture and oxygen can react with steel and form rust. Removing water and protecting bare metal helps reduce this risk.
Mud and plant residue
Wet soil, sap, and leaves can cling to blades and joints, making tools harder to clean and use.
Handle damage
Repeated exposure to moisture can affect wood and may reveal cracks, splinters, or loose connections.
Stiff moving parts
Grit and dried residue can interfere with pivots, springs, hinges, and adjustable joints.
Does Every Garden Tool Need Oil After Rain?
No. The goal is to protect suitable metal surfaces, not coat every part of every tool. Clean, dry carbon steel often benefits from a thin film of corrosion-inhibiting oil, especially when the tool will be stored for several days.
Stainless steel is generally more resistant to rust than ordinary carbon steel, but it is not immune to corrosion. Painted, powder-coated, or otherwise finished surfaces may need only cleaning and drying. Check the manufacturer's care instructions before applying oil or other products.
Avoid putting oil on grips, footrests, or handles where it could make the tool slippery. Keep lubricants away from surfaces that contact food crops when the product is not suitable for that use.
Usually benefits from protection
Clean, dry, exposed steel surfaces on shovels, hoes, and similar tools may benefit from a suitable protective oil.
Needs targeted care
Pruner pivots and hinges may need a small amount of lubricant specified by the manufacturer.
Check before coating
Painted, coated, plastic, fiberglass, and specialty tool surfaces may have specific care requirements.
What You Need to Clean and Protect Garden Tools
Gather your supplies before starting. Most routine post-rain care requires simple household or garden items, so you do not need a special cleaning kit for every tool.
Use a brush that can remove soil without damaging the tool's finish. A stiff nylon brush works well for many surfaces, while a suitable wire brush can help remove loose rust from uncoated steel. Avoid aggressive scrubbing on delicate coatings, precision edges, or soft materials.
Keep separate clean cloths for drying and applying oil. A small brush can help reach tight spaces around pruner joints, but do not force tools into gaps where they could damage springs or seals. Use a stable work surface so wet tools do not roll or slide while you clean them.
Source: artofit.org
Stiff cleaning brush
Use it to remove wet soil, dried mud, and plant debris from blades, tines, and handles.
Bucket of clean water
Use a modest amount of water to remove remaining dirt after brushing. Avoid soaking wooden handles or complex mechanisms.
Clean, absorbent cloths
Use one cloth to wipe away dirt and another to dry the tool fully.
Suitable maintenance oil
Choose a product compatible with the metal and moving parts you need to protect.
Gloves and eye protection
Wear suitable protection when brushing rust, handling sharp edges, or working with cleaning products.
Sharpening supplies
Keep a suitable sharpening stone or file for routine edge care, following the tool manufacturer's instructions.
Choose Cleaning Products Carefully
Plain water and a brush are enough for much of the dirt left by rain. For sticky sap, use a cleaner suitable for the tool's material and follow its label. Some solvents can damage plastic grips, paint, seals, or other finishes.
Do not mix cleaning chemicals. If you use a disinfectant on tools that contacted diseased plants, follow the product label for dilution, contact time, ventilation, and rinsing. Some disinfectants can corrode metal if they remain on the surface, so clean and dry the tool as directed after treatment.
Keep oil, solvents, disinfectants, and sharpening supplies away from children and pets. Store products in their original labeled containers and follow local disposal guidance.
Start with the mildest method
Brush away loose dirt first and use water only where needed.
Protect finishes
Test a suitable cleaner on a small, inconspicuous area if material compatibility is uncertain.
Follow product labels
Use the stated protective equipment, contact time, and cleanup steps for any chemical product.
Step-by-Step: How to Maintain Garden Tools After Rainy Weather
The most reliable routine follows a simple order: remove dirt, wash only as needed, dry thoroughly, inspect the tool, and protect suitable metal surfaces. Doing these steps in order keeps you from trapping moisture beneath oil or overlooking damage hidden by mud.
Work on one tool at a time. Place sharp tools on a stable bench with the cutting edge pointed away from you, and keep the work area clear. If a tool has a removable battery, electrical parts, or a powered mechanism, follow its manual before cleaning it.
Source: simplifygardening.com
Step 1: Remove loose soil
Use a brush or wooden scraper to lift mud from the blade, head, teeth, or tines. Avoid using your fingers to scrape near sharp edges.
Step 2: Wash off remaining dirt
Wipe the tool with a damp cloth or rinse suitable surfaces briefly. Do not leave the tool sitting in a bucket of water.
Step 3: Dry every surface
Wipe away visible water and check joints, sockets, holes, and seams. Allow the tool to air-dry in a sheltered, ventilated place.
Step 4: Inspect for damage
Look for rust, cracks, loose fasteners, bent parts, worn edges, and signs of movement where the head joins the handle.
Step 5: Apply suitable protection
Spread a thin film of appropriate oil over clean, dry bare steel. Lubricate moving joints only as the manufacturer recommends.
Step 6: Store the tool properly
Place the tool in a dry storage area with airflow. Keep sharp edges protected and avoid damp floors or wet walls.
How to Remove Stubborn Mud
Let very sticky mud soften slightly if needed, then loosen it with a brush or blunt wooden scraper. A brief wipe with water can help remove the remaining film. Dry the tool promptly afterward.
Avoid striking a tool against concrete to knock off dirt. Repeated impacts can damage handles, loosen heads, or chip cutting edges. Do not use a metal scraper that could gouge a finished blade.
If packed soil remains around a joint or socket, use a small brush and inspect the opening from different angles. Do not dismantle a tool unless its design and maintenance instructions allow it.
For shovel blades
Brush from the socket toward the blade tip, keeping hands clear of the edge.
For rake teeth
Remove clumps between the teeth, then wipe the head and the area where it attaches to the handle.
For hand trowels
Clean both sides of the blade and check where the blade meets the handle.
How to Dry Tools Thoroughly
Drying means more than wiping the large metal surface. Water can remain around rivets, bolts, springs, pivot joints, and the socket where a tool head meets its handle. Give these areas extra attention with a clean cloth.
Set tools on a dry rack or bench in a sheltered spot with good airflow. Open pruning shears carefully if the manufacturer permits it so you can reach accessible parts of the joint. Never place your fingers between the blades.
Avoid storing tools while they still feel damp. If the weather is humid, allow more time for air-drying and check the hidden areas before applying protective oil.
Look for trapped water
Check joints, hollow sections, sockets, and attachment points.
Use airflow
A dry, ventilated shed or garage helps moisture escape without exposing tools to more rain.
Skip high heat
Do not use an open flame or an intense heat source to dry tools, handles, or lubricants.
How to Oil Metal Parts Without Making a Mess
Once the tool is completely clean and dry, apply a small amount of suitable maintenance oil to exposed steel. Spread it with a cloth so the surface has a thin film rather than thick drips. Excess oil attracts dirt and can make the handle or grip slippery.
For pruners and loppers, place a small amount of the recommended lubricant at the pivot or other designated moving parts. Open and close the tool as instructed to distribute the lubricant, then wipe away excess. Keep the cutting surfaces clean and avoid leaving oily residue where it could transfer to plants or hands.
Some tools have coated blades or specialized components that should not receive certain oils or solvents. When in doubt, use the care instructions for the exact tool rather than applying a general treatment to every part.
Use a light coating
A thin protective film is usually more useful than a heavy layer that collects dust.
Keep grips clean
Wipe off oil from handles, footrests, and other areas where a firm grip or stable footing is needed.
Check compatibility
Use a lubricant intended for the tool's materials and follow the manufacturer's instructions.
Care for Different Types of Garden Tools
Different tools have different weak points, so use a routine that fits each design. A shovel needs a clean blade and a secure handle, while a pruner needs special attention to its pivot, spring, and cutting edges. Powered tools require the additional precautions in their manuals.
Start with the same basics for every hand tool: remove soil, clean as needed, dry fully, and inspect for damage. Then focus on the parts that affect how the tool works.
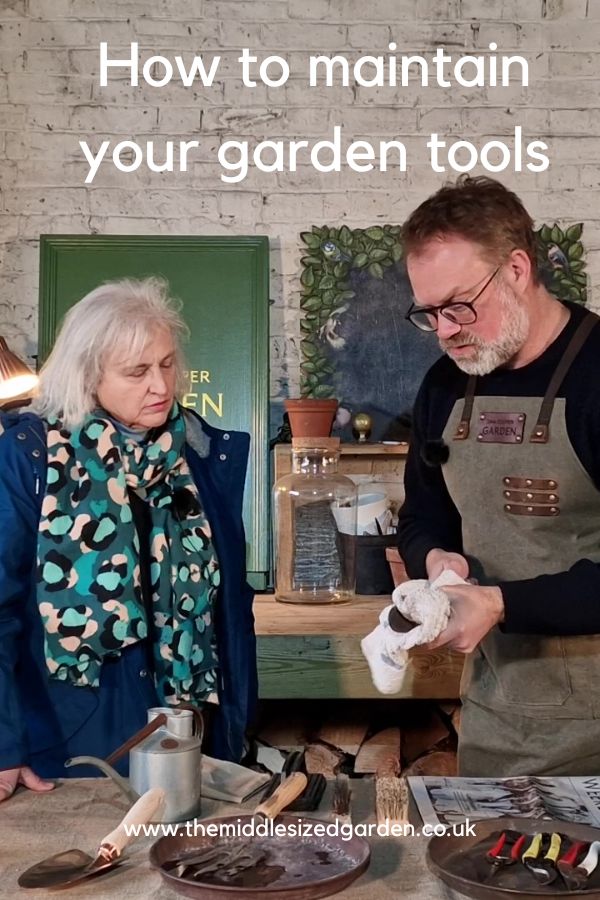
Source: themiddlesizedgarden.co.uk
Digging tools
Clean shovels, spades, forks, and trowels. Inspect the blade, tines, handle, and head attachment.
Cutting tools
Clean pruners, loppers, and hand saws carefully. Check blades, pivots, locks, and springs.
Raking and cultivating tools
Remove packed soil and leaves from teeth, tines, and joints. Check for bending or loose heads.
Powered garden equipment
Disconnect the power source as directed before cleaning, and follow the model-specific instructions.
Shovels, Spades, Hoes, and Trowels
Digging tools often collect thick layers of wet soil. Brush off the mud, clean any remaining residue, and dry the blade before putting it away. Check the area where the metal head joins the handle because water and grit can collect there.
Inspect wooden handles for splinters, cracks, and movement. Check fiberglass or composite handles for cracks, crushing, or other visible damage. A loose head or badly cracked handle can fail under pressure, so do not keep using a damaged tool.
If the blade is dull, restore the edge according to the tool's design and care instructions. Use the correct file or sharpening method, secure the tool, and wear eye protection. Do not grind away large amounts of metal just to remove surface discoloration.
Check the blade
Look for deep rust, dents, bent edges, and cracks that could affect safe use.
Check the connection
Make sure the head does not shift or rotate where it meets the handle.
Protect bare steel
After cleaning and drying, apply a thin protective coating if suitable for the tool.
Pruners, Loppers, and Hand Saws
Cutting tools need careful cleaning because sap and fine plant debris can cling to blades. Remove this residue with a suitable cleaner, then wipe the metal dry. If a plant was diseased, clean and disinfect the tool as appropriate before using it on healthy plants.
Check pruner blades for chips, bends, and dull spots. Look at the pivot bolt, spring, locking catch, and grips. If the tool feels stiff after cleaning, inspect for trapped grit and apply the specified lubricant rather than forcing the joint.
Use a sharpening method suited to the blade type. Bypass pruners have cutting edges that meet in a particular way, while anvil pruners cut against a softer or flatter surface. Follow the design's instructions to avoid changing the cutting angle or damaging the blade.
Hand saws need special care around their teeth. Use a brush or cloth in a direction that reduces the risk of cuts, and keep the saw covered when stored. Do not drag your fingers along the teeth to check sharpness.
Remove sap
Use a compatible cleaner and wipe away residue before applying lubricant.
Check moving parts
Look for loose pivot hardware, damaged springs, and locks that do not engage properly.
Protect sharp edges
Use blade covers or safe storage positions to prevent cuts and protect the edge.
Rakes, Forks, and Cultivators
Rakes and cultivators can hold wet soil between their teeth. Brush out each gap, wipe the head, and check for bent teeth or cracks near the attachment point. A clean head moves through soil more easily and is simpler to inspect.
For a garden fork, inspect each tine for bends, cracks, or signs that it has pulled away from the head. Do not try to straighten a badly damaged tine with improvised force. Replace or repair the tool according to the manufacturer's guidance.
Wooden handles should be dry before storage. If a handle feels rough, address splinters carefully once the tool is clean and dry. Do not coat the grip with a substance that could make it slippery.
Clear every gap
Packed mud between teeth can trap moisture and hide cracks.
Check the head
Look for loose fasteners, bent tines, and movement where the head meets the handle.
Keep the grip secure
Store the tool dry and repair rough or damaged handles before the next use.
Cordless and Electric Garden Tools
Powered tools need more care than simple hand tools. Before cleaning, switch the tool off and disconnect it from the power source as specified in its manual. Remove a battery only if the manufacturer's instructions direct you to do so, and keep battery contacts and electrical components dry.
Never immerse a powered tool or spray water into vents, switches, battery bays, motors, or charging ports. Use the cleaning method permitted by the manufacturer. If water has entered an electrical compartment or the tool behaves unusually after getting wet, stop using it until it has been assessed or serviced as appropriate.
For battery-powered equipment, inspect the battery case for cracks, swelling, moisture, or damage. Do not charge a wet or damaged battery. Follow the battery manufacturer's instructions and keep charging equipment in a dry location.
Gas-powered equipment has its own risks, including hot surfaces and fuel. Let the engine cool fully before cleaning, and follow the manual for safe shutdown, fuel handling, and storage. Never work near an open flame while handling fuel or flammable cleaners.
Disconnect power safely
Follow the exact manual instructions before cleaning blades, attachments, or exposed surfaces.
Keep electrical parts dry
Use a dry or lightly damp cloth only where permitted, and avoid water entering openings.
Do not use damaged batteries
Stop using a battery that is wet internally, cracked, swollen, or otherwise damaged.
How to Remove Early Rust From Garden Tools
Small patches of surface rust can often be removed before they spread, but the right approach depends on the depth of the damage. Orange or reddish discoloration on otherwise sound steel may be superficial. Deep pits, flaking metal, cracks, or major loss of material need closer inspection and may make a tool unsafe.
First, brush away loose dirt and dry the tool. Use a suitable abrasive pad, fine steel wool, or a wire brush on uncoated steel if appropriate. Work gently and keep abrasive particles away from moving joints, delicate finishes, and cutting edges that should retain a specific profile.
After removing loose surface rust, wipe away residue and check the metal again. Dry the tool completely, then apply suitable protective oil to the exposed steel. If the rust returns quickly, review the cleaning and storage routine and consider whether moisture remains trapped in the tool's design.
Source: plantglossary.com
Light surface rust
Clean the area, remove loose rust gently, wipe away particles, dry the metal, and apply suitable protection.
Stubborn rust
Use a method compatible with the metal and finish. Follow any cleaner or rust remover label and protect nearby surfaces.
Deep pitting or structural damage
Do not rely on oil to repair damaged metal. Assess whether the tool can be safely repaired or should be replaced.
Can Vinegar Remove Rust From Garden Tools?
Vinegar can help loosen some rust, but it is not the best routine choice for every tool. Acidic solutions may affect finishes and can attack metal if exposure is too long. They can also leave a tool vulnerable to renewed corrosion if the residue is not removed and the surface is not dried promptly.
For a lightly rusted shovel or hoe, gentle mechanical cleaning may be enough. If you choose a rust remover or another chemical treatment, verify that it is suitable for the metal and follow its label closely. Do not mix acids with bleach or other cleaning products.
Avoid soaking tools with wooden handles, springs, bearings, or complex assemblies in acidic solutions. Water and chemicals can enter joints and create problems that are difficult to see.
Use the mildest effective method
Try brushing and gentle abrasion before turning to chemical rust removal.
Protect other materials
Avoid soaking wood, grips, springs, and precision mechanisms.
Finish with full drying
Remove treatment residue as directed, dry the tool, and protect bare steel.
Protect Wooden Handles and Tool Joints
Wooden handles need time to dry and should be checked for cracks, splinters, and loose fittings after wet weather. Wood naturally absorbs and releases moisture, so repeated wetting and drying can change its dimensions. A sound handle with a secure head is safer and more comfortable to use.
Wipe wooden handles with a damp cloth rather than soaking them. Dry them in a sheltered area with airflow, away from direct intense heat. Excessive heat can cause wood to dry unevenly and may contribute to cracking.
Once the handle is fully dry, smooth minor rough spots with suitable sandpaper if the tool's construction allows it. If the manufacturer recommends a wood treatment, use a compatible product sparingly and allow it to cure before use. Avoid oily or waxy finishes that make the grip slippery.
Check the joint between the handle and metal head. If the head moves, the handle is cracked, or the fastening system has failed, stop using the tool until it is repaired correctly. A head that comes loose during digging or striking can cause serious injury.
Source: themiddlesizedgarden.co.uk
Dry without overheating
Use a sheltered, ventilated area rather than a heater, flame, or prolonged direct heat.
Inspect the full handle
Look for cracks, deep splinters, soft spots, and damage near the head or grip.
Keep the head secure
Do not use a tool if its head shifts, rotates, or pulls away from the handle.
What About Fiberglass and Plastic Handles?
Fiberglass and plastic handles generally do not need wood oil, but they still require cleaning and inspection. Wipe away soil and dry the handle, then look for cracks, crushing, deep cuts, or loose fittings. Pay special attention to the area around the metal head, where stress can build up.
Do not assume a handle is safe because its outer surface looks clean. A damaged composite handle can fail under load. Replace a compromised tool or arrange an appropriate repair rather than covering damage with tape or another temporary fix.
Skip wood treatments
Do not apply linseed oil or other wood finishes to fiberglass or plastic unless the manufacturer specifically permits it.
Check for hidden weakness
Inspect attachment points and areas with deep scratches or impact damage.
Store Garden Tools Correctly After Rain
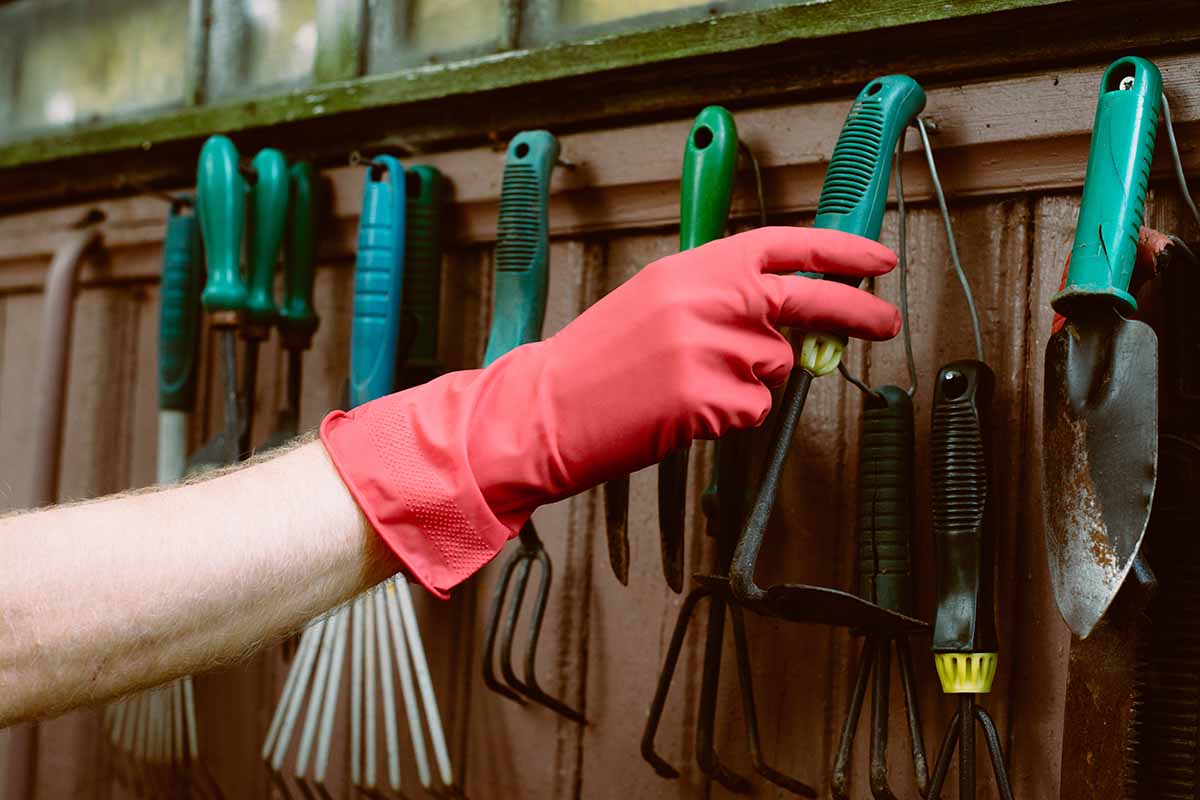
Good storage keeps tools dry after cleaning and helps prevent moisture from building up between uses. A covered shed, dry garage, or ventilated storage area is often suitable. The best location protects tools from direct rain and ground moisture while allowing damp air to escape.
Do not lean wet tools against an outside wall or leave them lying on the lawn. Grass and soil can keep the metal damp long after the rain stops. If your storage area has a damp floor, use a raised rack or wall-mounted holder where the tools can dry safely.
Hang long-handled tools where their heads cannot fall or strike someone. Keep sharp tools in covers or secure positions, with cutting edges away from walkways. Store heavy tools low enough to lift safely and keep children away from sharp or pointed equipment.
Avoid crowding tools together while they are still damp. Contact between wet metal surfaces can trap moisture and make inspection harder. Leave enough room to reach each tool, wipe it down, and notice early signs of rust.
Source: plantglossary.com
Keep tools off damp ground
Use a dry shelf, rack, or suitable wall holder instead of leaving tools on soil or concrete that stays wet.
Improve airflow
Allow space around stored tools and address persistent dampness in the storage area.
Secure sharp tools
Use guards and stable holders, and keep blades and points away from hands and walking paths.
Separate wet equipment
Do not stack freshly cleaned tools in a tight pile where moisture can remain trapped.
What If Your Shed Is Damp?
A damp shed can undo careful cleaning. Check for roof leaks, water entering under the door, wet walls, and condensation on metal surfaces. Repair leaks and improve ventilation where possible before relying on the shed for long-term tool storage.
A raised shelf or dry cabinet may help if the floor is often wet. For a small enclosed storage area, a suitable moisture-control product may help manage damp air, but it does not replace leak repairs or airflow. Follow product instructions and keep moisture-control materials away from children and pets.
If tools still develop rust despite careful drying, inspect them more often and consider storing valuable cutting tools in a drier indoor location. A simple change in storage can matter more than applying extra oil to a tool that remains wet.
Find the source of moisture
Look for leaks, condensation, poor airflow, and water entering beneath doors.
Raise the tools
Keep metal heads and handles away from wet floors and standing water.
Recheck after storms
Inspect the storage area after heavy rain to catch leaks before tools are affected.
How Often Should You Maintain Garden Tools?
The best schedule depends on how often you garden, how wet the weather is, the materials in your tools, and where you store them. Tools used in wet clay soil may need more cleanup than tools used briefly in dry raised beds. Tools with exposed steel or moving parts also need closer attention than simple plastic accessories.
Use a short routine after each rainy session and a more detailed check at regular intervals. This prevents small problems from becoming major repairs. Before seasonal storage, clean tools thoroughly, inspect them, and protect suitable surfaces.
Source: greenlawnora.com
After each rainy session
Remove soil, clean as needed, dry thoroughly, and check for obvious damage.
Every few weeks during active use
Inspect cutting edges, pivots, handles, fasteners, and signs of rust. Adjust the schedule if tools are used heavily.
Before long-term storage
Give tools a thorough cleaning, dry them completely, apply appropriate protection, and store them in a dry area.
Before every use
Check that handles, locks, cutting edges, and tool heads are secure and safe.
A Simple Post-Rain Maintenance Checklist
A checklist makes it easier to care for tools even when you have several muddy items to clean. Use the list below as a practical starting point, then adjust it to match the manufacturer's instructions and the condition of each tool.
Remove
Brush off mud, leaves, grass, and other debris.
Clean
Wipe or rinse suitable surfaces to remove remaining dirt and sap.
Dry
Wipe all surfaces and check joints and sockets for trapped water.
Inspect
Look for rust, cracks, loose parts, dull edges, and damaged handles.
Protect
Apply compatible oil or lubricant only where needed.
Store
Place tools in a dry, ventilated area with sharp parts safely covered.
Common Mistakes to Avoid After Rain
Many garden tool problems come from a few rushed habits. The biggest is putting a dirty, wet tool away and assuming the next use will be soon enough to prevent damage. Even a tool that looks clean can hold water around a joint or beneath a layer of mud.
Another mistake is applying oil before cleaning or drying the tool. Oil cannot replace dirt removal, and a thick coat can trap grime or transfer to your hands. Clean first, dry fully, then apply a thin film where it is suitable.
Aggressive cleaning can cause damage, too. Harsh abrasives may remove protective finishes, strong chemicals may harm metal or grips, and pressure washing can force water into bearings, switches, or sealed spaces. Use the mildest method that gets the job done.
Finally, do not ignore damage just because a tool still works. A cracked handle, loose head, damaged battery, or defective lock can turn an ordinary garden task into an injury risk. Repair or replace the tool before returning it to service.
Source: greenlawnora.com
Mistake: Storing tools while wet
Correction: Dry the metal, joints, and handle before storage.
Mistake: Using too much oil
Correction: Apply a thin film to compatible metal surfaces and wipe off excess.
Mistake: Ignoring hidden dirt
Correction: Check pivots, sockets, teeth, and the area beneath the tool head.
Mistake: Using harsh cleaning methods
Correction: Avoid incompatible chemicals, excessive abrasion, and water entering powered equipment.
Mistake: Reusing damaged tools
Correction: Stop using tools with cracked handles, loose heads, unsafe locks, or structural damage until repaired or replaced.
When Should You Replace a Garden Tool?
Replacement is worth considering when damage affects the tool's strength or safe operation. Deep corrosion that removes substantial metal, cracked structural parts, badly damaged handles, and failed locking mechanisms may make repair impractical or unsafe.
Surface rust, a dirty blade, or a loose fastener does not automatically mean a tool is beyond repair. Assess the damage, consult the manufacturer where possible, and use suitable replacement parts for repairs. Do not improvise a fix for a load-bearing handle or a powered safety mechanism.
Usually repairable when damage is minor
Examples may include removable surface rust, routine dullness, or a replaceable fastener when the rest of the tool is sound.
Needs careful assessment
Examples include bent heads, deep pitting, damaged pivots, and handles with significant cracks.
Stop using until resolved
Examples include loose striking-tool heads, cracked load-bearing parts, broken locks, and damaged electrical or battery components.
Special Care for Tools Used on Diseased Plants
If rain has left your garden wet and you have been pruning plants with suspected disease, cleaning may need an extra step. Soil, sap, and plant debris can carry unwanted organisms between plants, although the type of disease and its route of spread determine the sanitation method needed.
Remove visible debris first, then use a disinfectant or sanitation method suitable for the tool and the plant-health problem. Follow the label or reliable plant-disease guidance for the proper concentration and contact time. A quick wipe may not provide the same result as a method that requires the surface to remain wet for a specified period.
After sanitation, complete any required rinsing and drying. Some products can corrode metal or damage finishes if left on the tool. Keep separate cloths for cleaning and drying, and avoid moving from a suspect plant to a healthy one without the required sanitation step.
Cleaning a tool does not guarantee that every plant disease has been eliminated. Some problems spread through soil, water, insects, infected plant material, or other routes. If a disease is persistent or difficult to identify, seek guidance from a local Cooperative Extension office or a qualified plant-health professional.
Source: stickymudandbellylaughs.com
Remove plant residue first
Visible debris can interfere with effective sanitation and should be cleared before applying a disinfectant.
Use a suitable method
Match the sanitation product and procedure to the suspected disease, tool material, and label instructions.
Protect the metal afterward
Rinse if directed, dry thoroughly, and apply compatible corrosion protection when appropriate.
Should You Disinfect Every Garden Tool After Rain?
No. Ordinary rain does not mean every tool needs chemical disinfection. For routine work in healthy plants, removing dirt, cleaning as needed, drying, and storing tools properly are generally the main tasks.
Disinfection is more relevant when tools contact diseased plant material or when a particular plant-health problem calls for sanitation. Use a targeted method rather than applying strong chemicals to every tool after every shower.
Routine gardening
Focus on removing soil, drying tools, and checking for damage.
Suspected disease
Clean and sanitize tools according to reliable guidance for the specific plant-health concern.
Frequently Asked Questions
Q
Can I Leave Garden Tools Outside Overnight After Rain?
It is better to bring garden tools into a dry, covered area after use. Leaving them outdoors overnight can expose them to dew, more rain, damp soil, and temperature changes. These conditions may encourage rust and keep wooden handles wet for longer.
If you cannot clean every tool right away, move it under cover first and keep it off the ground. Clean and dry it as soon as practical, especially if it has exposed steel, a cutting edge, or moving parts.
Q
What Is the Best Oil for Garden Tools After Rain?
The best choice depends on the tool and the surface being protected. A suitable corrosion-inhibiting oil can help protect bare steel, while a lubricant specified by the manufacturer is often best for pruner pivots and other moving parts.
Apply only a thin film to clean, dry metal and wipe off excess. Avoid oiling grips, footrests, or other areas where it could reduce traction. Follow the manufacturer's instructions if the tool has a special coating or if residue could contact edible crops.
Q
How Do I Stop My Shovel From Rusting After Rain?
Brush away soil, wipe or rinse the blade as needed, and dry it completely. Check the socket and the area where the blade meets the handle, since moisture can remain in those spots.
For a suitable bare steel blade, apply a thin layer of protective oil before storage. Keep the shovel in a dry shed or garage, raised off damp ground. If rust appears, remove light surface rust early and inspect deeper damage before using the shovel again.
Q
Can I Use WD-40 on Garden Tools?
Some water-displacing and multipurpose products can help with moisture removal or light corrosion protection, but their suitability depends on the exact formulation and intended use. They may not replace a dedicated lubricant where a tool manufacturer specifies one.
Read the product label and the tool manual before use. Clean and dry the tool first, apply only where permitted, and wipe away excess. Keep residues away from grips, food-contact surfaces, and plant surfaces where the product is not approved for that purpose.
Q
Should I Sharpen Garden Tools After Every Rainy Day?
No. Rain does not automatically make a blade dull. Clean and dry cutting tools after use, then inspect their edges for nicks, wear, or poor cutting performance.
Sharpen when the edge needs it, using a method suited to the tool. Follow the manufacturer's guidance and wear appropriate eye and hand protection. A clean, well-maintained edge is useful, but unnecessary sharpening can remove metal and change the blade's shape.
Q
How Do I Maintain Garden Tools During a Long Rainy Week?
After each use, remove mud and plant debris, dry the tool, and move it into a covered storage area. If the weather is humid, allow extra drying time and check joints and handles before putting the tool away.
During a break in the weather, inspect tools for rust, loose parts, dull edges, and handle damage. Apply suitable protection to clean, dry metal when needed. Do not leave powered tools or batteries wet, and follow their specific storage and charging instructions.
Q
Can Rain Damage Wooden Garden Tool Handles?
Rain does not always damage a wooden handle, but repeated wetting and drying can cause wood to swell, shrink, or develop cracks. Mud and water can also hide splinters or weaken an already damaged area.
Wipe the handle clean, let it dry naturally in a sheltered place, and inspect it before the next use. Apply a suitable wood treatment only if recommended for that handle, and never use a tool with a cracked handle or loose head.
Q
Do Stainless Steel Garden Tools Need Maintenance After Rain?
Yes. Stainless steel generally resists corrosion better than ordinary carbon steel, but it can still develop stains or corrosion under certain conditions. Dirt, plant residue, and trapped moisture should still be removed.
Clean and dry stainless steel tools after use, inspect joints and cutting edges, and follow the manufacturer's care instructions. Oil may be useful on some moving parts, but it is not always needed on the entire stainless steel surface.
✦ Wrapping Up
Conclusion
Maintaining garden tools after rainy weather is a simple habit that helps keep them clean, useful, and safer to handle. Remove mud and plant debris, wash off remaining dirt when needed, dry every part, and inspect the tool before returning it to storage. Pay extra attention to exposed steel, cutting edges, pivots, and the places where handles join tool heads.
The right care routine depends on the tool's material and design. Bare steel may need a thin layer of suitable protective oil, wooden handles need gentle drying and inspection, and powered equipment requires model-specific precautions. If you find deep rust, a cracked handle, a loose head, or damaged electrical parts, address the problem before using the tool again.
A dry storage area completes the routine. Keep tools off wet ground, allow air to circulate, protect sharp edges, and check the shed or garage for leaks after heavy storms. These small steps make it easier to return to gardening when the weather clears without facing a pile of rusty, muddy equipment.
💡 Key Takeaway
After your next rainy gardening session, clean one tool at a time, dry all surfaces and joints, inspect for damage, apply suitable protection to exposed steel, and store each tool in a dry, ventilated place.





No comments:
Post a Comment